Chapter 9 · Capturing Sound: Microphones, Acoustics & Gear
Studio Equipment
“The technology is a tool. You have to know what you're building to utilise the tool properly.”
—Quincy Jones
By the end of this chapter, you will be able to:
- Trace the recording signal path (source, mic, preamp, converter, DAW) and the monitoring signal path (DAW, converter, monitor controller, monitors), explaining the role of each link in both directions
- Compare the four console types — pure analog, hybrid, digital, and control surface — and explain how a DAW combined with outboard gear replaces a console for most modern studios
- Route a signal through a console channel strip in correct order — input/preamp, insert, dynamics, EQ, fader, pan, and bus assignment — and distinguish pre-fader from post-fader sends and their respective uses
- Apply gain-staging principles to set optimal signal levels at every stage of the recording chain, targeting peaks around -12 dBFS at the DAW input to maximize SNR without clipping
- Identify the core outboard processor categories — preamps, EQs, compressors (FET, opto, VCA, and variable-mu), gates, and saturation devices — and describe the function each performs in the signal chain
- Distinguish Class A, Class AB, and Class D amplifier topologies by their operating principles, efficiency, heat output, and typical studio applications
- Select the appropriate meter type — peak, VU, or LUFS — for a given metering task, and describe the role of the monitor controller as the engineer's primary daily reference point
- Describe how audio interfaces consolidate AD/DA conversion, preamp, and computer connectivity into a single unit, and explain how clock quality and jitter affect conversion fidelity across budget tiers
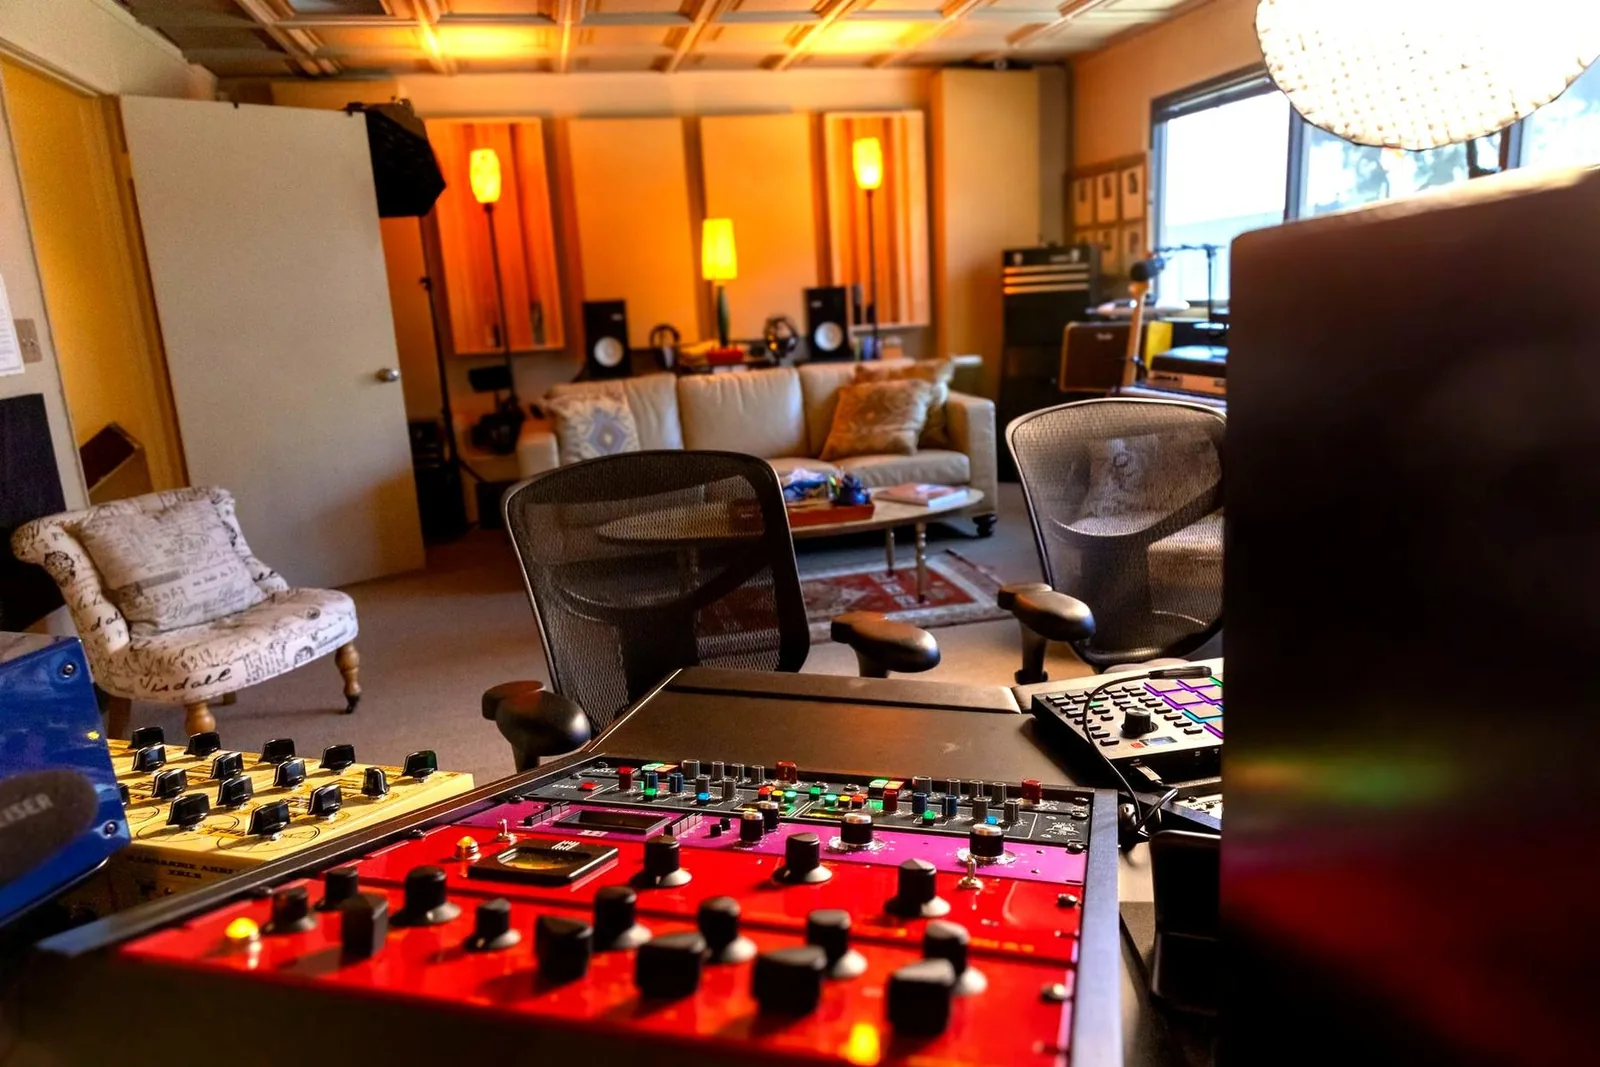
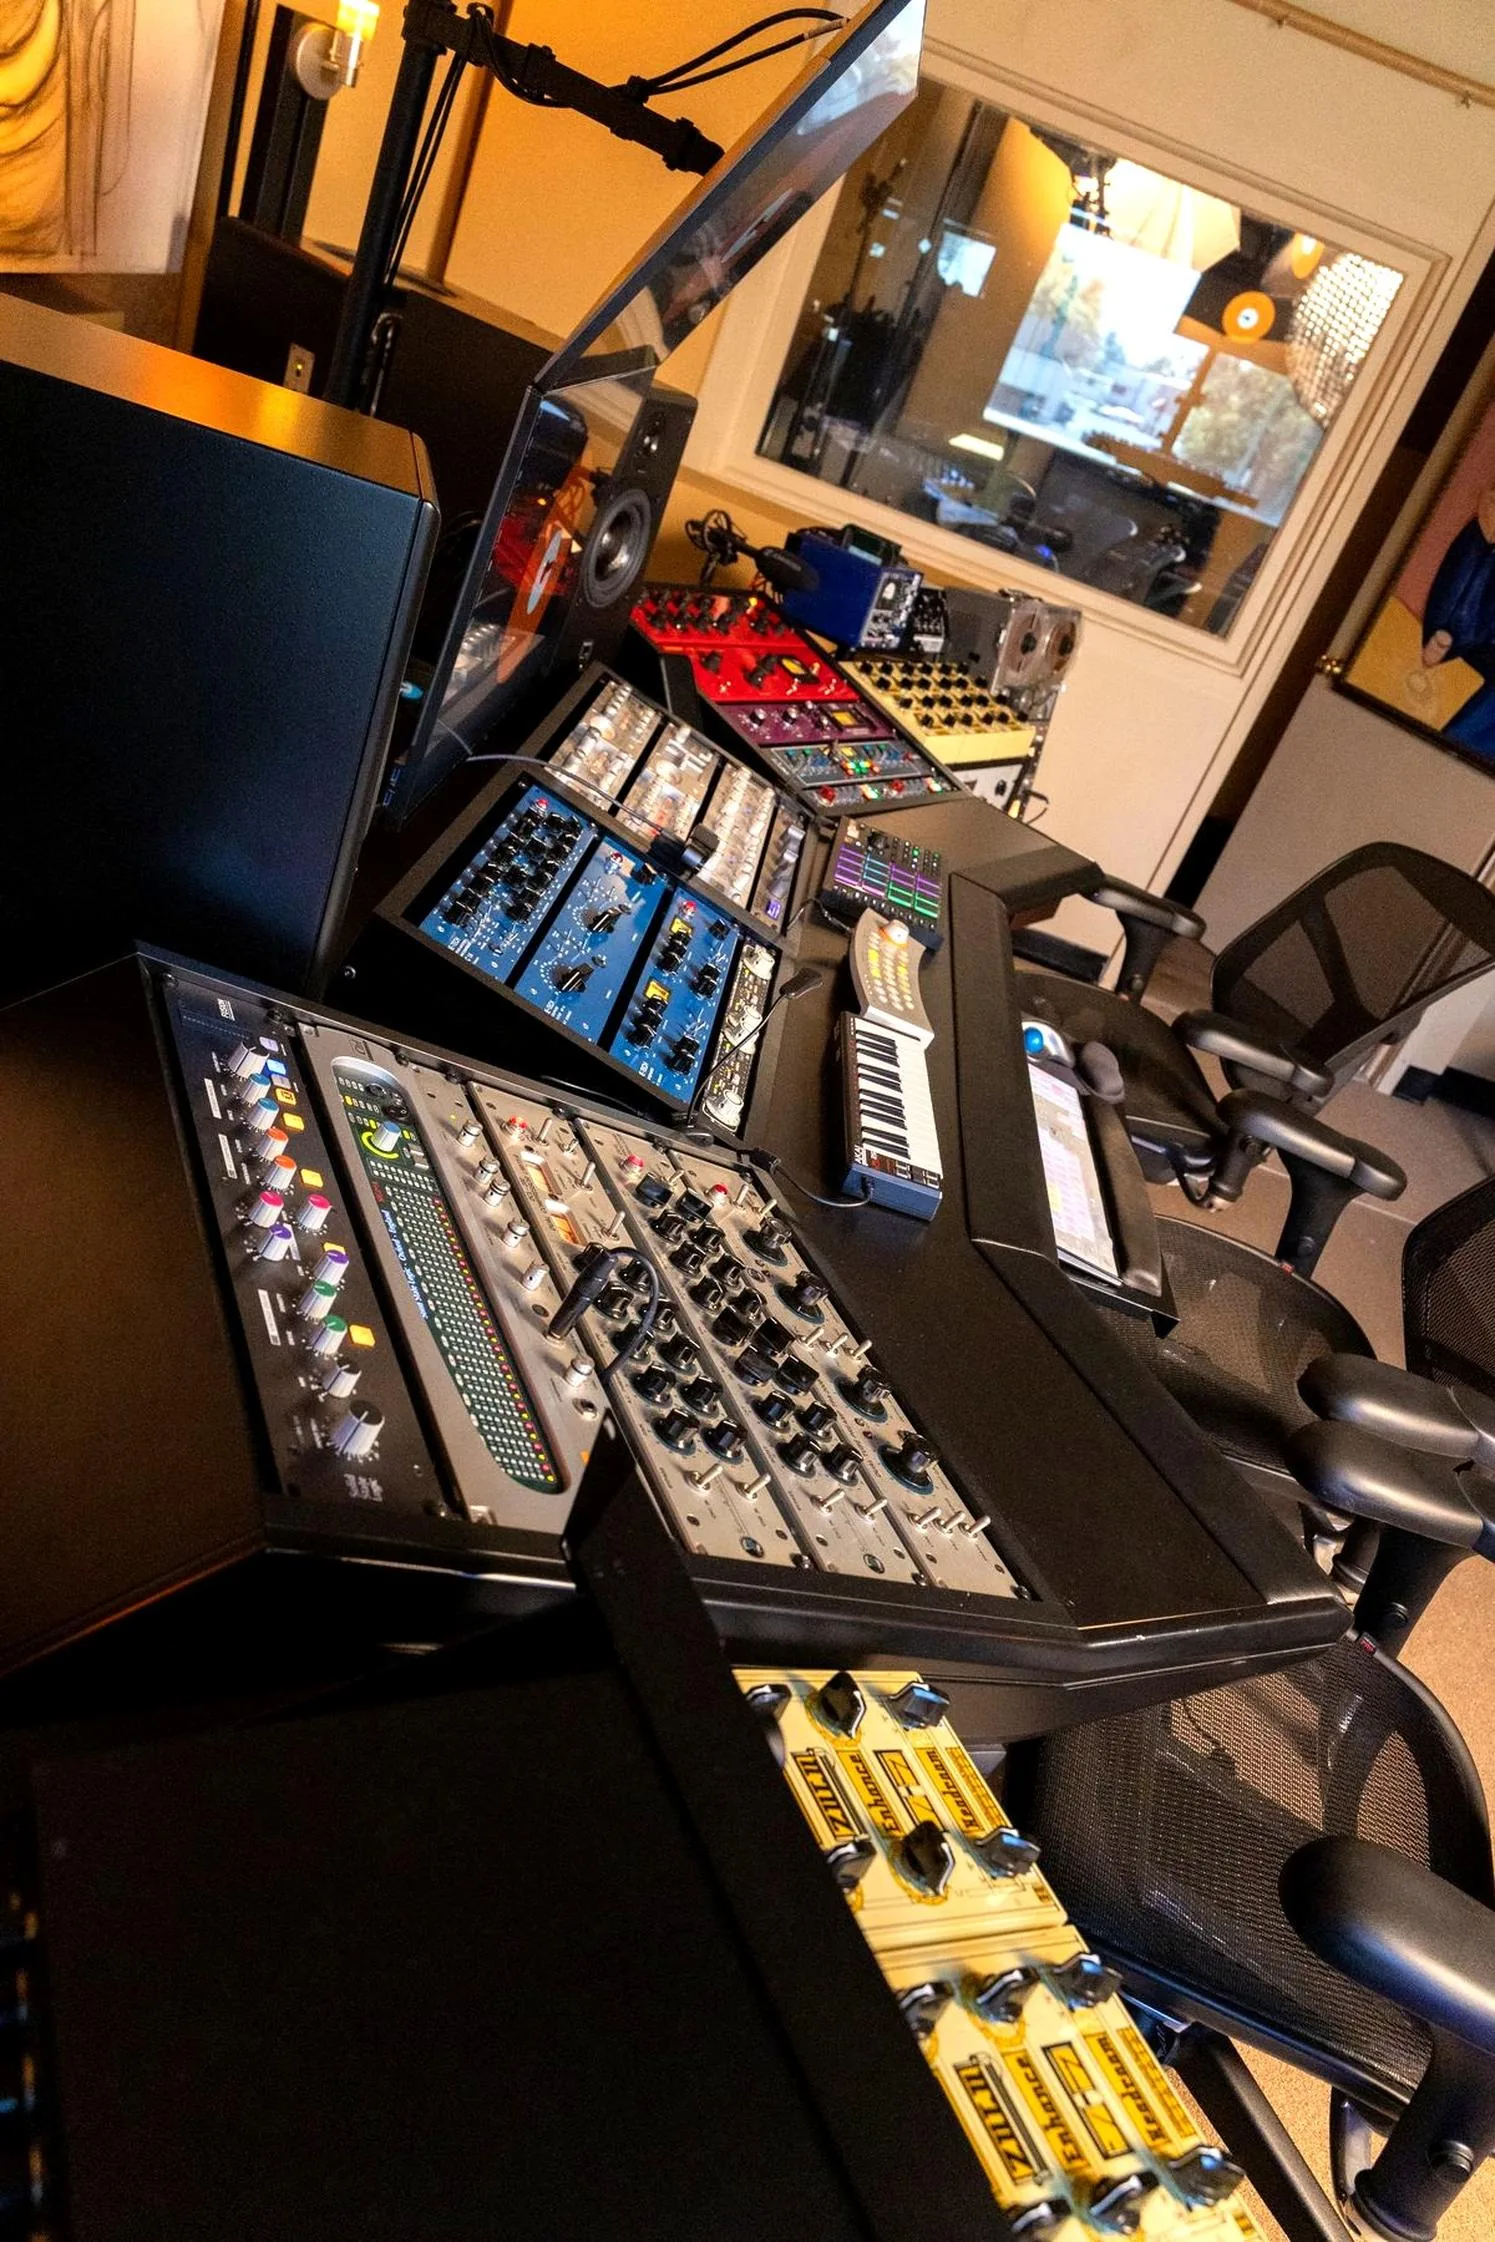
The first time I walked into a professional studio, I froze. Racks of blinking lights stretched floor to ceiling, a massive console dominated the room, and cables ran everywhere like veins through a living organism. It looked like the cockpit of a spaceship. But after a few weeks of assisting sessions, I realized something: most of that gear falls into a handful of categories, and once you understand what each category does, the whole room makes sense.
That realization is what this chapter is about. Not memorizing model numbers or brand names—understanding the purpose of each piece of equipment and where it sits in the signal chain. Once you have that, you can walk into any studio in the world and know exactly what you are looking at.
The Studio Signal Flow
suggest a correctionBefore diving into individual pieces of gear, you need to understand how they all connect. Signal flow is the path audio takes from the moment it enters the studio to the moment it leaves the speakers. Every piece of equipment in this chapter exists somewhere on this path.
A typical recording signal flow:
Sound Source → Microphone → Preamp → (optional: EQ / Compressor) → AD Converter → DAW
The signal is now digital and can be processed, edited, and mixed within the software.
A typical playback/monitoring signal flow:
DAW → DA Converter → Monitor Controller → Power Amplifier (built into the enclosure on active monitors) → Studio Monitors
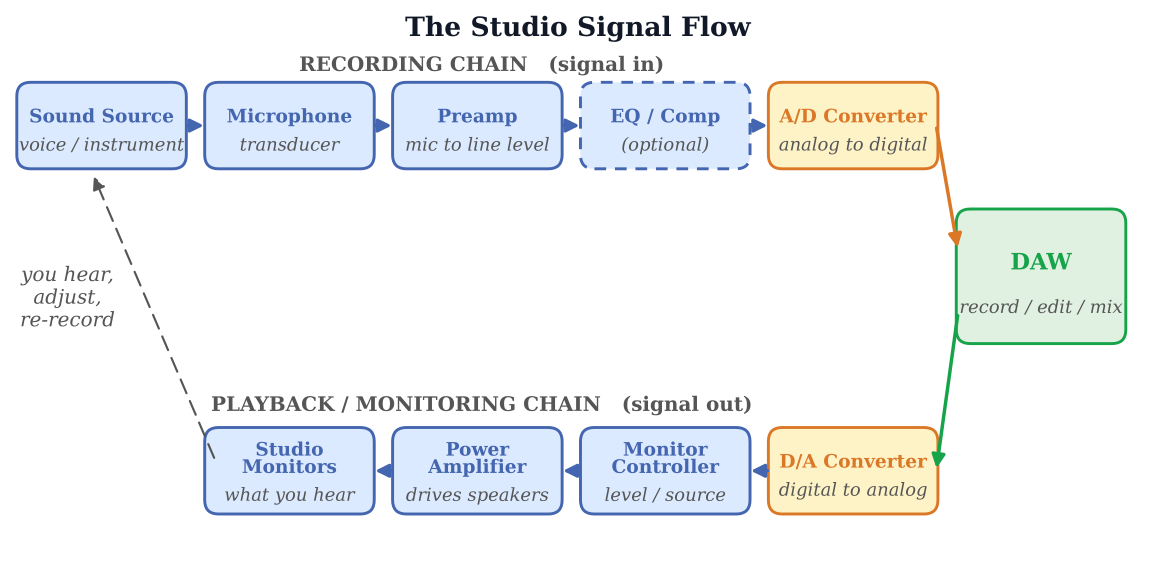
Everything the engineer hears passes through this chain. If any link in either direction is weak—a noisy preamp, a poor converter, inaccurate monitors—the quality of the entire system suffers. A chain is only as strong as its weakest link.
In many modern studios, an audio interface combines the preamp, AD/DA converter, and computer connection into a single unit, simplifying the signal flow considerably. But the same principles apply regardless of whether the components are separate rack units or combined in one box.
The Console
suggest a correctionThe console (or mixing board) is the large device you see in the control room of professional studios. A high-end board from manufacturers like SSL, Neve, or API offers many channels of analog signal path with built-in preamps, EQ, compression, and gating on every channel strip. Consoles were once indispensable—necessary for recording, routing, and combining (“mixing”) multiple inputs.
Sitting at an SSL 4000 for the first time, I understood why people call these boards instruments. The EQ on every channel had a character—a musical quality that a plugin tries to approximate but never quite matches. The faders moved under your fingers like the controls of a great car. There is a romance to a real analog console that no DAW can give you, and I will not pretend otherwise.
But romance is wonderful; payroll is not—and as the next section explains, a console is a luxury, not a requirement.
Consoles fall into four categories. Pure analog consoles (SSL 4000, SSL Origin, Neve VR, API Legacy, API The Box, Audient ASP-series) handle all audio in the analog domain and are used for recording and mixing. Hybrid analog/digital consoles (SSL AWS and Duality, Neve Genesys) pair a full analog signal path with built-in AD/DA converters and DAW control, so a single surface can record and mix both in the analog domain and inside the computer. Digital consoles (Yamaha CL/QL series, DiGiCo SD series, Avid VENUE S6L, Allen & Heath dLive) digitize the audio at the inputs and process everything in the digital domain—they dominate live sound, broadcast, and film/post-production, where massive channel counts and total recall matter more than analog character. Control surfaces (Avid S1/S3/S6, SSL UF8, Icon Platform M+) pass no audio at all—they communicate via MIDI or Ethernet protocols to control the DAW. When you move a fader on a control surface, it sends a digital message telling the software to adjust the level. Motorized faders, transport controls, and instant recall at a fraction of the cost of a full analog console—which is why control surfaces are the most common console-style hardware in working project studios today.
Channel Strip Signal Flow
suggest a correctionIf you understand one channel of a console, you understand them all—every channel strip is identical. Walk down the strip from top to bottom and you walk through the entire life of a signal, in order. Even if you never touch a hardware console, this is exactly what Pro Tools replicates on every track.
The first time a producer asked me, mid-take, to “bypass the dynamics and add a touch of EQ from the insert,” I had to make him repeat it twice. I knew what an EQ was. I knew what dynamics were. I knew what an insert was. What I did not know was where each of those lived on the signal path, in what order, and which would step on which if I changed them in the wrong sequence. That afternoon taught me the channel strip more thoroughly than a year of reading about it. Once you have walked the order of operations under pressure, you do not forget it.
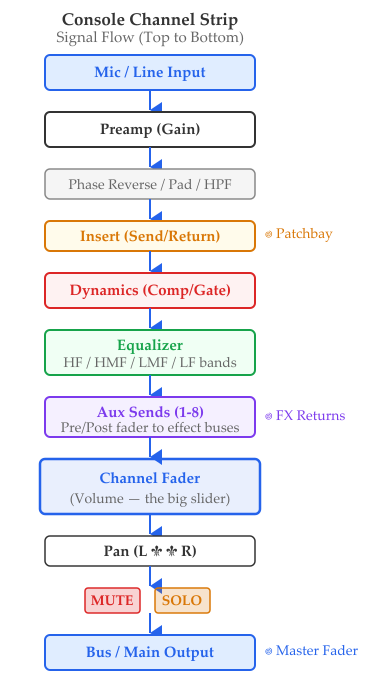
The signal arrives first at the input/preamp stage, where trim and gain controls bring the level up to whatever the rest of the strip wants to see. This is also where you usually find phase inversion, a pad switch for hot sources, and a high-pass filter to roll off rumble before it ever reaches the rest of the path. Get this stage right and the rest of the strip takes care of itself; get it wrong and no amount of fader-pushing downstream will save the take.
Just past the preamp sits the insert point—a break in the signal flow where you can route the signal out to an external processor and back. In Pro Tools, inserts work identically; plugins drop into the insert slots and process the signal in series. The insert is the cleanest place to patch in a hardware compressor or EQ mid-tracking—I have lost count of the times an 1176 dropped into a vocal insert turned a take from “usable” into “done.”
The middle of the strip is the processing block: built-in compression/gating and equalization. On a classic SSL, dynamics come before EQ by default, but on most consoles the order is switchable, so you can place either ahead of the other. On a high-end console (SSL, Neve, API), every channel has its own EQ and dynamics section, and that is a huge part of the board's character.
After the processing block come the sends, which tap copies of the signal off to external processors, effects, or headphone mixes. A pre-fader send taps the signal before the channel fader, so the send level is independent of fader moves—useful for headphone cue mixes that need to stay stable while the engineer rides faders. A post-fader send taps after the fader, so the send level follows fader moves—standard for reverb and delay during mixing, since you want the effect to fade with the source. Get the pre/post wrong on a cue mix and the singer hears the engineer's fader work as the take progresses—a fast way to ruin a vocal performance.
Toward the bottom sits the output fader and pan, which control the level sent to the master fader and the stereo position. The fader is the single most-used control in mixing.
Finally, the signal hits routing and bus assignment—where the channel is sent for grouping. For example, all drum tracks can be sent to Bus 1–2, putting control of the entire drum group under a single fader. This is the moment your channel becomes part of a mix instead of just a strip.
Inside the strip the signal flows vertically; once it hits the bus, it travels horizontally across the console toward the master. Here is the same path again, expanded with the granular stages an analog console actually exposes:
Input → Preamp/Gain → High-Pass Filter → Insert Send → [Outboard Processing] → Insert Return → Dynamics → EQ → Aux Sends (pre/post-fader taps) → Fader → Pan → Bus Assignment → Master Bus → Master Fader → Output
If you ever get the chance to mix on a real analog console—even an older one in a school or rehearsal space—take it. The physical experience of moving faders and hearing analog summing will deepen your understanding of every virtual tool you use.
You Do Not Need a Console
suggest a correction“I was terrified doing it. I didn't know if it was going to work. I don't believe in voodoo, but I did believe that the 64-input Neve console and the wall of outboard gear was the only reason my mixes didn't sound like total shit.”
—Andrew Scheps, on switching to mixing entirely in the box (Tape Op #133, 2019)
Now that you understand what a console does, here is what most working studios have figured out: everything a console provides—preamps, EQ, compression, automation, panning, levels, talkback, meters, summing—can be found in a DAW, in plugins, or in individual rack-mount units (outboard gear). Consoles are a luxury, not a necessity. Many world-class records have been mixed entirely in a DAW with no analog console in the signal path, and the sonic difference between a $100,000 SSL and a well-configured Pro Tools system is real but subtle—most listeners would never hear it.
And here is the part that surprises most people: buying individual pieces often gets you better equipment than a console. A console's built-in preamp, EQ, and compressor are all from the same manufacturer, designed to the same price point. When you buy individual units, you can cherry-pick—a Neve-style preamp from one company, a Pultec-style EQ from another, an 1176-style compressor from a third. You get more flavors, more character, and arguably higher quality at each stage of the signal chain, often for less than the cost of a single console channel.
This is the approach used in most studios today, and it is why the rest of this chapter covers individual processors rather than console features. Your DAW is your console. The outboard gear you choose is what gives your studio its unique sound.
For the vast majority of working engineers and producers, the days of needing a 64-input console with a wall of outboard behind it are over. Scheps—who mixed Adele, Red Hot Chili Peppers, Black Sabbath, Metallica—now mixes entirely in Pro Tools. If a top-tier engineer can deliver records of that scale in the box, you do not need a console to make great music. You need a clear signal chain, a few well-chosen tools, and the ears to hear what they're doing.
Amplifier Fundamentals
suggest a correctionNearly every audio device in your studio contains amplifiers—your microphone preamp, your headphone amp, your monitor controller, even the output stage of your audio interface. (Passive gear is the exception: a passive DI, a passive ribbon mic, a patchbay, and ordinary cables do their jobs with no amplification at all.) Understanding the basic principles of amplification helps you make better purchasing decisions and troubleshoot signal flow problems.
At its core, an amplifier increases the amplitude (level) of an audio signal. The microphone preamp takes the tiny voltage from a microphone (as low as a few millivolts) and amplifies it to line level (approximately 1.23 volts for professional +4 dBu equipment). The power amplifier takes line-level signals and amplifies them to the high voltages and currents needed to drive loudspeakers.
+4 dBu and −10 dBV: Two Worlds of Line Level
Massenburg's reminder about signal levels lands here with real weight. When you connect a piece of outboard gear and the signal is either whisper-quiet or crushing the input, the culprit is almost always a mismatch between the two operating levels that divide the professional and consumer audio worlds.
+4 dBu is the pro standard. The reference voltage is 1.228 V RMS. Consoles, professional interfaces, outboard processors, and broadcast gear all live here. The level gives the signal enough headroom over the noise floor to travel through a complex chain of processors without accumulating noise.
−10 dBV is the consumer standard. The reference voltage is 0.316 V RMS. Consumer hi-fi, some DJ mixers, certain keyboards, and semi-pro gear operate here. That puts −10 dBV about 11.8 dB below +4 dBu in practice—a gap that is not subtle.
| Level | Voltage (RMS) | Typical gear |
|---|---|---|
| +4 dBu | 1.228 V | Consoles, pro interfaces, outboard |
| −10 dBV | 0.316 V | Hi-fi, DJ mixers, some keyboards |
What happens when the levels are mismatched. Send a −10 dBV consumer source into a +4 dBu professional input and the signal arrives nearly 12 dB too soft. The engineer cranks gain to compensate, and the noise floor—also boosted—rides along for the entire chain. The result is a clean but thin signal buried in hiss. Run it the other direction—a +4 dBu pro output into a −10 dBV consumer input—and the signal arrives about 12 dB too hot. The receiving device clips immediately, or sits hard against its headroom ceiling, adding the kind of edgy, harsh distortion that no EQ can fix after the fact.
The fixes. Many modern interfaces and some patchbay rows carry a −10/+4 switch—flip it and the level is matched in hardware with no signal degradation. Dedicated level-match boxes (the Ebtech Line Level Shifter class—now sold as the Morley MLLS 2) handle the conversion between worlds when the interface has no switch. In a pinch, careful gain-staging can compensate—an extra 12 dB of makeup on a preamp output, or pulling 12 dB from a fader before the destination—but this always trades headroom and SNR for convenience, and it is the last resort, not the first move. The cleanest studios standardize on +4 dBu throughout and treat −10 dBV devices as exceptions that need active management at the patchbay. (See the gain staging section in this chapter and the dBu/dBV definitions in Chapter 2 for the underlying math.)
Three topologies dominate audio: Class A, Class AB, and Class D. The differences sound abstract on paper, but you can feel them with your hand on the chassis—a Class A unit runs hot enough that you can feel it from a foot away, a Class D unit could sit on your lap and you would not notice. That temperature difference is not a flaw; it is the entire engineering trade-off made physical.
In a Class A amplifier, the output transistors conduct the full audio waveform at all times—the output stage never switches off. Because nothing ever has to “hand off” between transistors, there is no crossover distortion, and the result is the lowest distortion and most linear response of any topology. The price is heat: a Class A amp wastes most of its power as warmth, runs hot to the touch, and is the least power-efficient. That is why you find Class A in boutique microphone preamps and high-end mic-level circuits where signal purity matters more than efficiency, and almost never in power amps that have to drive speakers all day.
Class AB is the compromise that runs the working world. Each output transistor handles slightly more than half the waveform, with a small overlap region that prevents the audible distortion you would otherwise get at the crossover point between the two halves. The result is good linearity with much better efficiency than Class A. Most professional power amplifiers and studio monitor amps are Class AB.
Class D is often called “digital” amplification, though technically it is analog switching. The output transistors flip on and off at very high frequencies and the signal is reconstructed at the output. Class D is extremely power-efficient, runs cool, and delivers high power from a small enclosure. That is why most modern active studio monitors—Genelec, Neumann, ADAM Audio, Focal—use Class D amplification on at least the woofer, though some higher-powered designs (Neumann's tri-amplified KH 310 among them) stay with Class AB. Twenty years ago, Class D was associated with cheap PA gear; today it powers some of the best monitors in the world.
Gain Staging
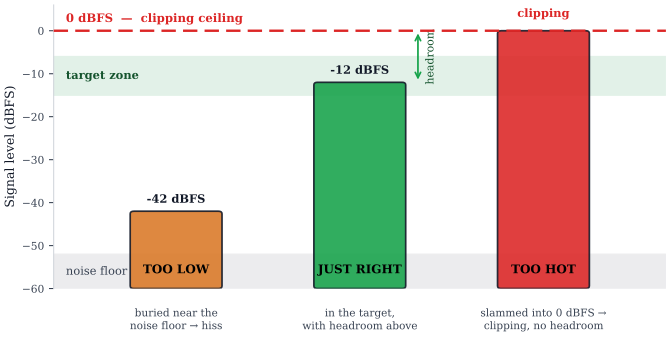
suggest a correctionGain staging is the practice of setting the optimal signal level at every point in the audio chain—from the microphone through the preamp, any outboard processors, the AD converter, and into the DAW. The goal is to keep the signal well above the noise floor (so it is clean) but well below clipping (so it does not distort) at every stage. A quick word on the numbers, since this book cites a few: they are not in conflict, because each belongs to a different stage. You track individual signals to peak around −12 dBFS for headroom; −18 dBFS is the alignment tone you use to set unity through analog gear, and −20 dBFS is the pink-noise level for monitor calibration; and a finished mix goes to mastering peaking around −6 to −3 dBFS. Different jobs, one principle—well above the noise floor, well below clipping.
I have seen sessions where the preamp was cranked to the max, the converter input was clipping, and the student's response was to turn the fader down in Pro Tools. The recording was ruined before it ever reached the software. Poor gain staging is one of the most common mistakes in recording—and one of the easiest to prevent.
When each device in the chain receives signal at its designed operating level, the entire system performs at its best—maximum signal-to-noise ratio (SNR) with no distortion. As a general rule, aim for peaks around −12 dBFS on the DAW's input meters during tracking, with nothing hotter than about −6.
One more rule that nobody ever tells the new engineer: do not pad one device only to crank the next one up to compensate. Every gain change has a noise penalty. If you cut 6 dB at the preamp and then boost 6 dB at the EQ to “get the level back,” you have boosted the noise floor right along with the signal. Set the level correctly at the source and let the chain pass it through cleanly. The fewer cuts and boosts the signal sees on its way to the converter, the cleaner it arrives.
Preamps
suggest a correctionA microphone preamplifier (mic preamp, or simply preamp) boosts the mic-level output of a microphone to line level. Every professional microphone connects to a preamp before anything else in the signal chain. When I first A/B'd the same vocal through a Neve 1073 and the stock preamp on a budget interface, I finally understood the price tag on the boutique stuff—not loudness difference, character difference. The 1073 had weight and air the interface preamp simply could not produce.
The primary control is gain—how much the signal is amplified. Many professional preamps have two gain stages: an input gain and an output gain. The trick most students miss: crank the input for color, and use the output for clean level. Pushing the input gain harder drives the front-end of the circuit (the transformer, the tubes, the discrete transistors) into the sweet spot where it adds the harmonic richness people pay for; the output gain then attenuates the result back down to a sensible recording level. Reverse the relationship—low input, high output—and you get a clean signal with none of the character. Same preamp, two completely different sounds.
Other common preamp controls include a phantom power switch (for condenser microphones), a phase inversion switch, a pad (attenuates an incoming signal that is too hot), and various tone-shaping options (EQ, impedance selection, input loading).
Like all analog gear, preamps come in tube and solid-state designs. Tube preamps are favored for their characteristic warmth—pleasant harmonic distortion that adds richness and body. Solid-state designs tend to be more transparent with a flatter frequency response.
The Neve 1073 is arguably the most famous preamp ever made. Designed by Rupert Neve in 1970 for Wessex Sound Studios in London, its warm, musical solid-state character became the sound of countless classic records. The 1073's magic comes from its discrete transistor circuit and custom transformers—not tubes. Today, several companies (Great River, Aurora Audio, Heritage Audio) build their own takes on the 1073 circuit—inspired replicas rather than clones, since Neve owns the trademarks and the originals—and Neve-style preamps remain the most sought-after in professional recording.
Other legendary preamps include the Avalon 737 (a tube channel strip with preamp, EQ, and compressor that has been a fixture in vocal recording for decades), the API 512 (a punchy solid-state design in 500 series format), and the Universal Audio 610 (a tube preamp used on countless classic recordings from the 1960s onward).
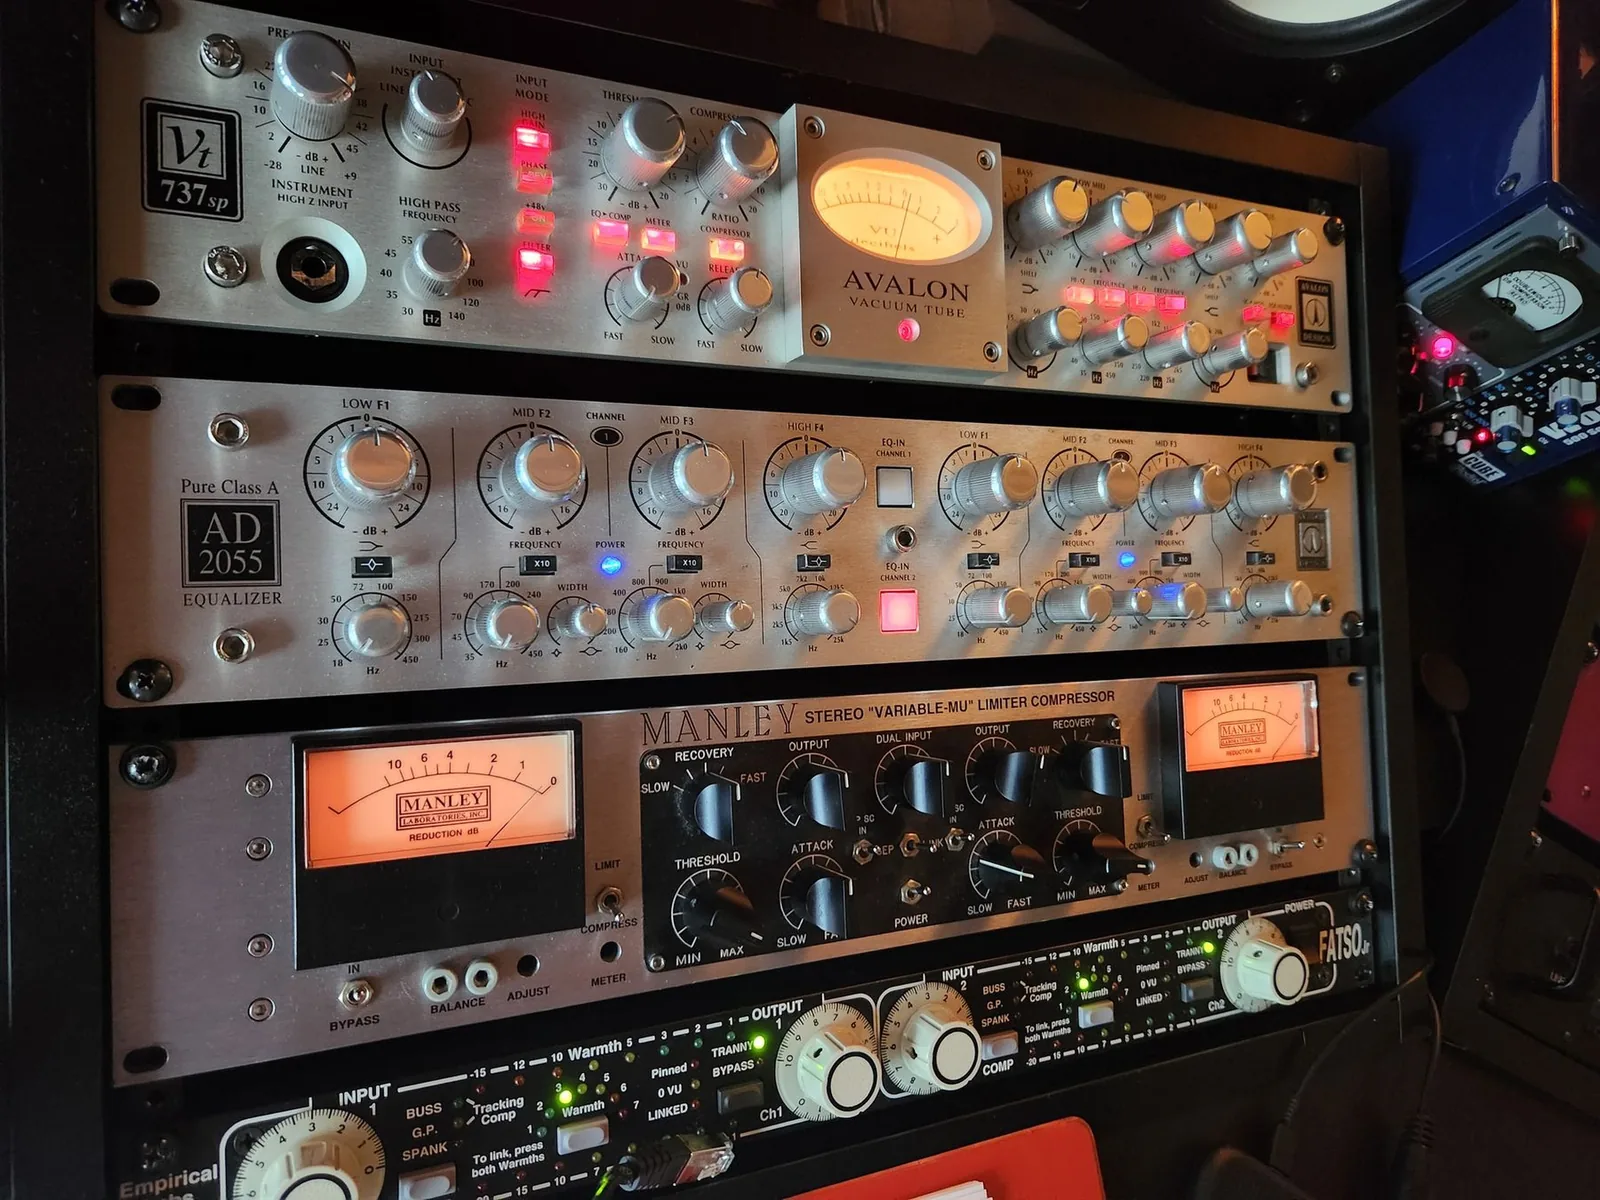
In practice, most working engineers run a quiet, transparent “house” preamp on most sources—a Millennia HV-3, Grace m101, or GML 8304—and reach for character preamps when the source asks for it. Drums often want the punch of an API. Vocals frequently want the air of a Neve or the warmth of a UA 610. Bass benefits from the clean push of a Manley tube DI. Acoustic guitar comes alive on a Grace or Millennia where transparency is the point. The trick is not memorizing which preamp pairs with which source—it is listening. The right preamp makes the source sound more like itself, not less.
Unless intentionally seeking distortion, set preamp levels so the performer's loudest moments do not clip the unit. It is always better to set levels conservatively than to discover distortion halfway through a great take—you can always add saturation in the mix, but you cannot remove it from a printed take.
DI Boxes
suggest a correctionA DI (Direct Injection) box is the front-end input device for high-impedance, unbalanced sources like electric guitar and bass. In most modern studios, the DI function is built directly into the preamp or audio interface itself—a Hi-Z input on the front panel that does the same job a standalone DI does. So in practice, you may already own all the DI you need without realizing it. Standalone DI boxes still earn their keep when you need a specific character (a Radial JDI for transparency, an Avalon U5 for solid-state Class A color, a Countryman Type 85 for live work) or when the preamp lacks a DI input. Where a preamp boosts mic-level signal, a DI connects a high-impedance, unbalanced output to a low-impedance, balanced input, performing level matching, impedance bridging, and signal balancing to minimize noise, distortion, and ground loops.
Passive DI boxes use a transformer—simple, reliable, and they handle high signal levels well (great for keyboards and active basses). Active DI boxes use electronic circuitry (powered by phantom power or a battery) for a cleaner signal with better frequency response, especially on long cable runs—ideal for passive guitars and basses with weaker pickups. DI boxes are also commonly used for reamping—sending a previously recorded DI signal back out through an amplifier (as discussed in Chapter 6). For short distances and quick setups, many engineers send a line-level output straight from the interface to the amp's input and call it good; the impedance match is imperfect but amp inputs are forgiving. For the cleanest reamping, though, a dedicated reamp box (the original Reamp by John Cuniberti, or the Radial JCR) provides proper impedance matching and a balanced send—worth the few hundred dollars if you reamp regularly.
Equalizers
suggest a correctionAn equalizer (EQ) boosts or cuts specific frequencies within a signal. While a preamp amplifies the entire signal equally, an equalizer provides surgical control over individual frequency ranges—it is the engineer's most powerful and most-used tool for shaping tone. Think of the bass and treble knobs on a car stereo—professional EQs work on the same principle but with far greater precision.
I once spent the better part of an hour trying to fix a kick drum that sounded boomy on every monitor in the room. Rolling off the lows did not help. Boosting the click did not help. The fix took thirty seconds once I found the actual culprit—a 4 dB narrow cut at 200 Hz, where the room and the kick were resonating together. The frequency you need to fix is almost never the one you think it is.
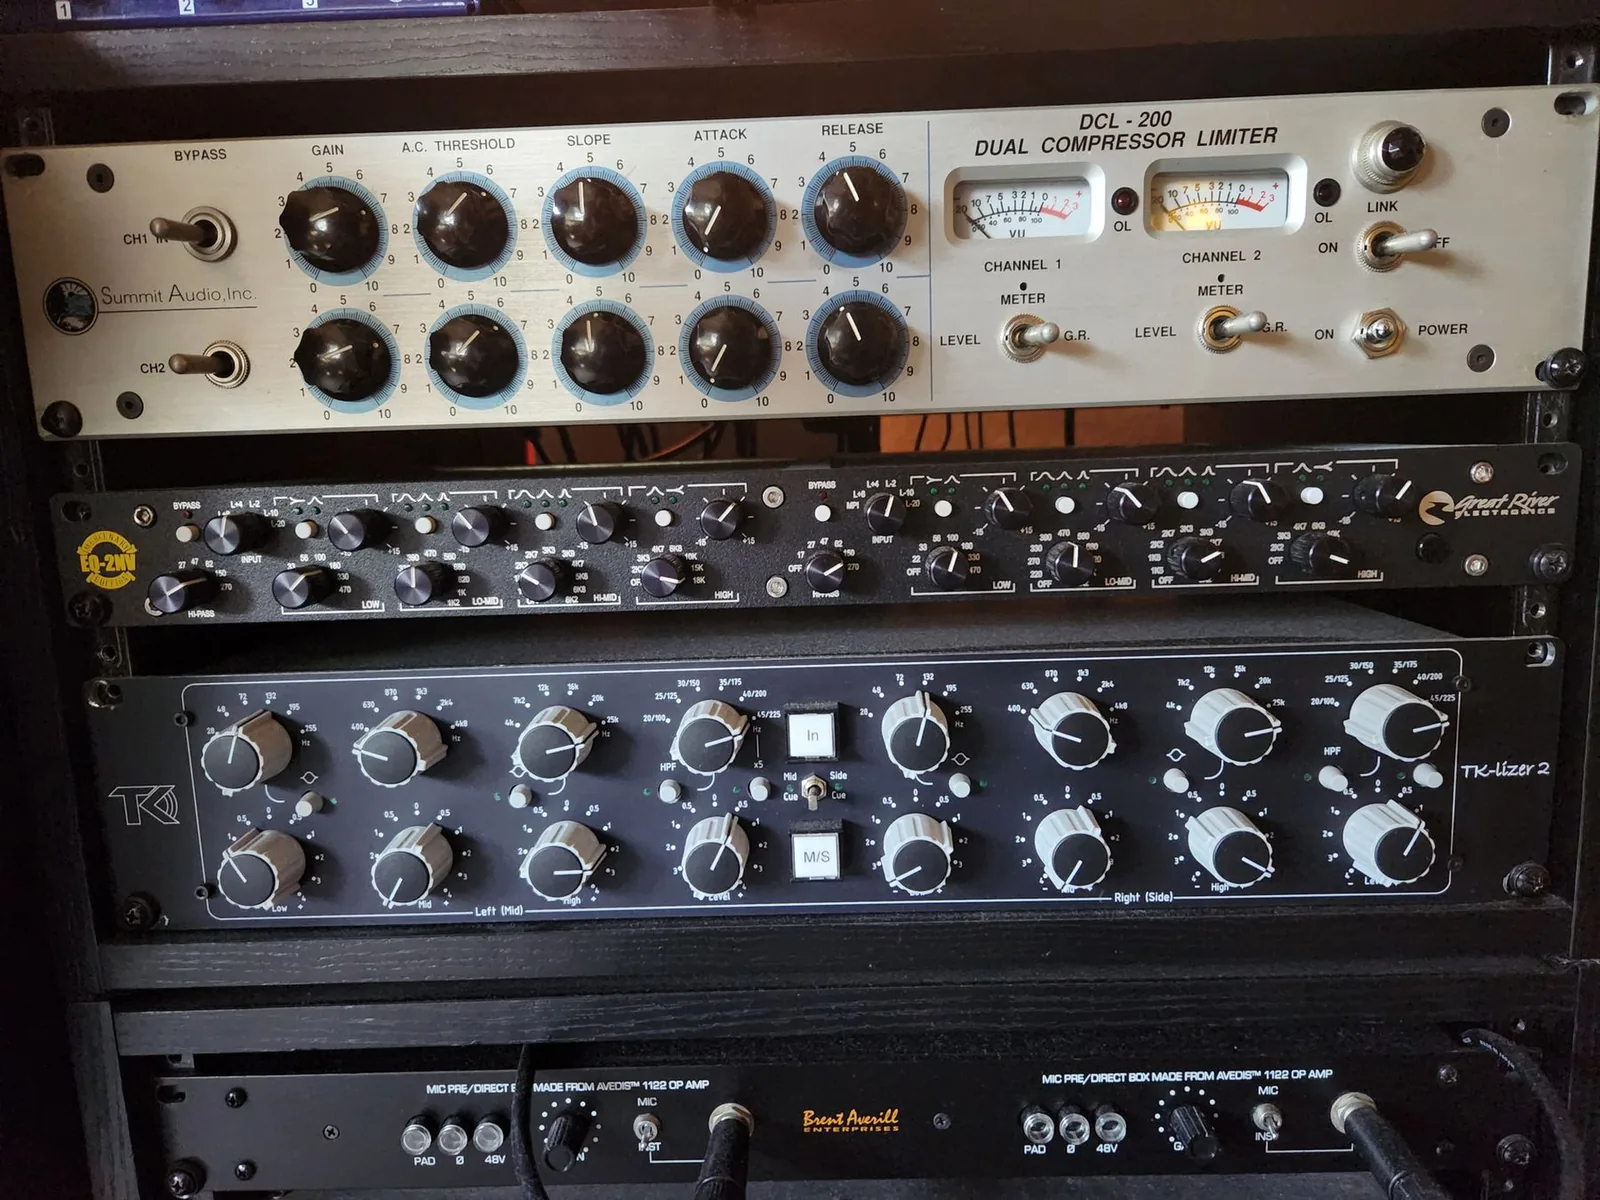
Professional EQs come in two main forms. A graphic EQ has fixed frequency bands, each with its own slider—what you see is what you get. A parametric EQ offers adjustable frequency, gain, and bandwidth/Q. Parametric EQs are far more common in professional recording and mixing because of their flexibility.
EQs also include several filter types: a bell (peak) filter boosts or cuts around a center frequency; a shelf filter boosts or cuts everything above or below a set frequency; a high-pass filter (HPF) removes everything below a set frequency; a low-pass filter (LPF) removes everything above. The high-pass filter is one of the most commonly used tools in mixing—applied to nearly every track to clean up unnecessary low-frequency rumble.
A foundational mixing philosophy: start by cutting problem frequencies rather than boosting desirable ones. Subtractive EQ sounds more natural and preserves headroom (Izhaki, 2023). Boosting still has its place—you reach for it when the source is genuinely missing what you want to hear—but the habit of cutting first will keep your mixes cleaner than almost any other single discipline. We cover equalization techniques in depth in Chapter 15.
Compressors and Limiters
suggest a correctionA compressor reduces the dynamic range of a signal—the difference between the quietest and loudest moments. By reducing the level of only the loudest sounds, a compressor narrows the gap, making the overall signal more consistent. Much of the “sound” of modern music comes from compression—that punchy kick drum, that smooth vocal riding perfectly above the mix, that glue holding the whole thing together.
I still remember patching an LA-2A across a vocal that had been jumping around the mix for an hour—the singer's performance simply locked in. Soft passages came up, loud passages came down, and the whole thing sat where it belonged without any fader rides. The right compressor on the right source works that magic—it makes the performance you already have sound like the one you wished the singer had given you.
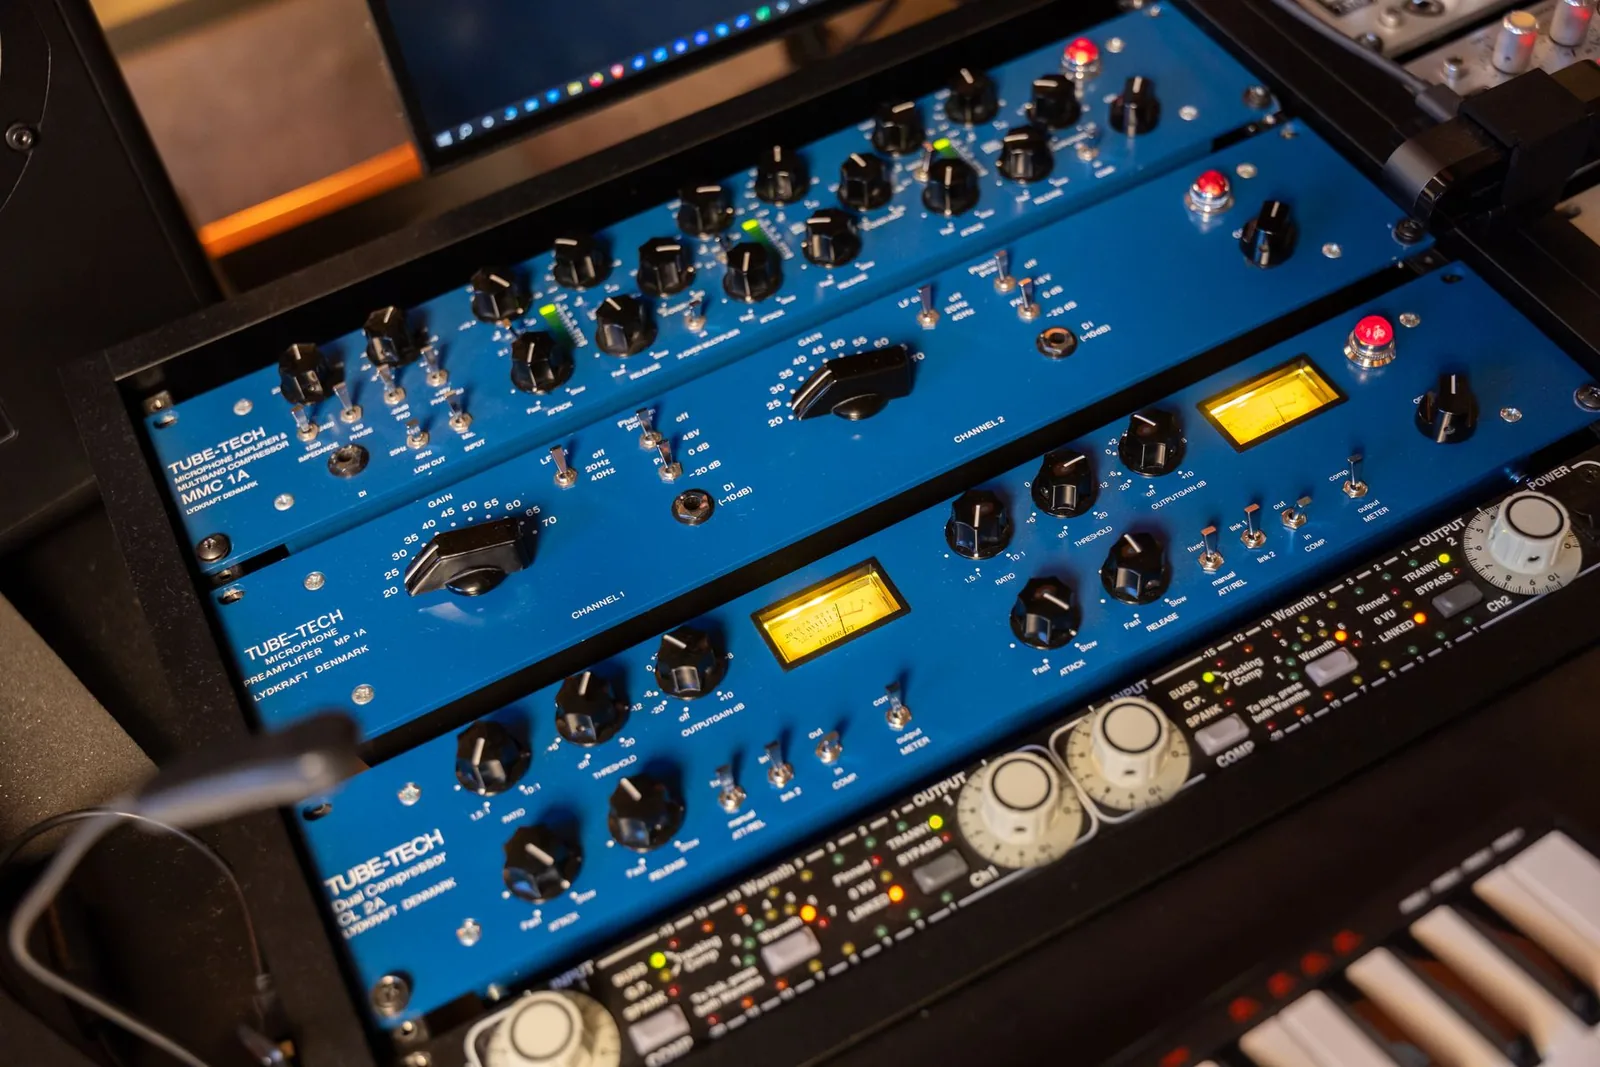
Every compressor shares the same core controls. Threshold sets the level at which compression begins—signal above it gets reduced, signal below it passes untouched. Ratio sets how much reduction is applied above the threshold (4:1 means 4 dB in yields 1 dB out). Attack is how quickly the compressor clamps down once the threshold is crossed—fast attack tames transients, slow attack lets them through. Release is how quickly it lets go once the signal drops back below threshold. Two more round out the set: knee (how gradually compression engages around the threshold) and makeup gain (level added back to compensate for what the compression took away). Master those six and you can drive any compressor, hardware or plugin.
Two classic compressors every engineer should know:
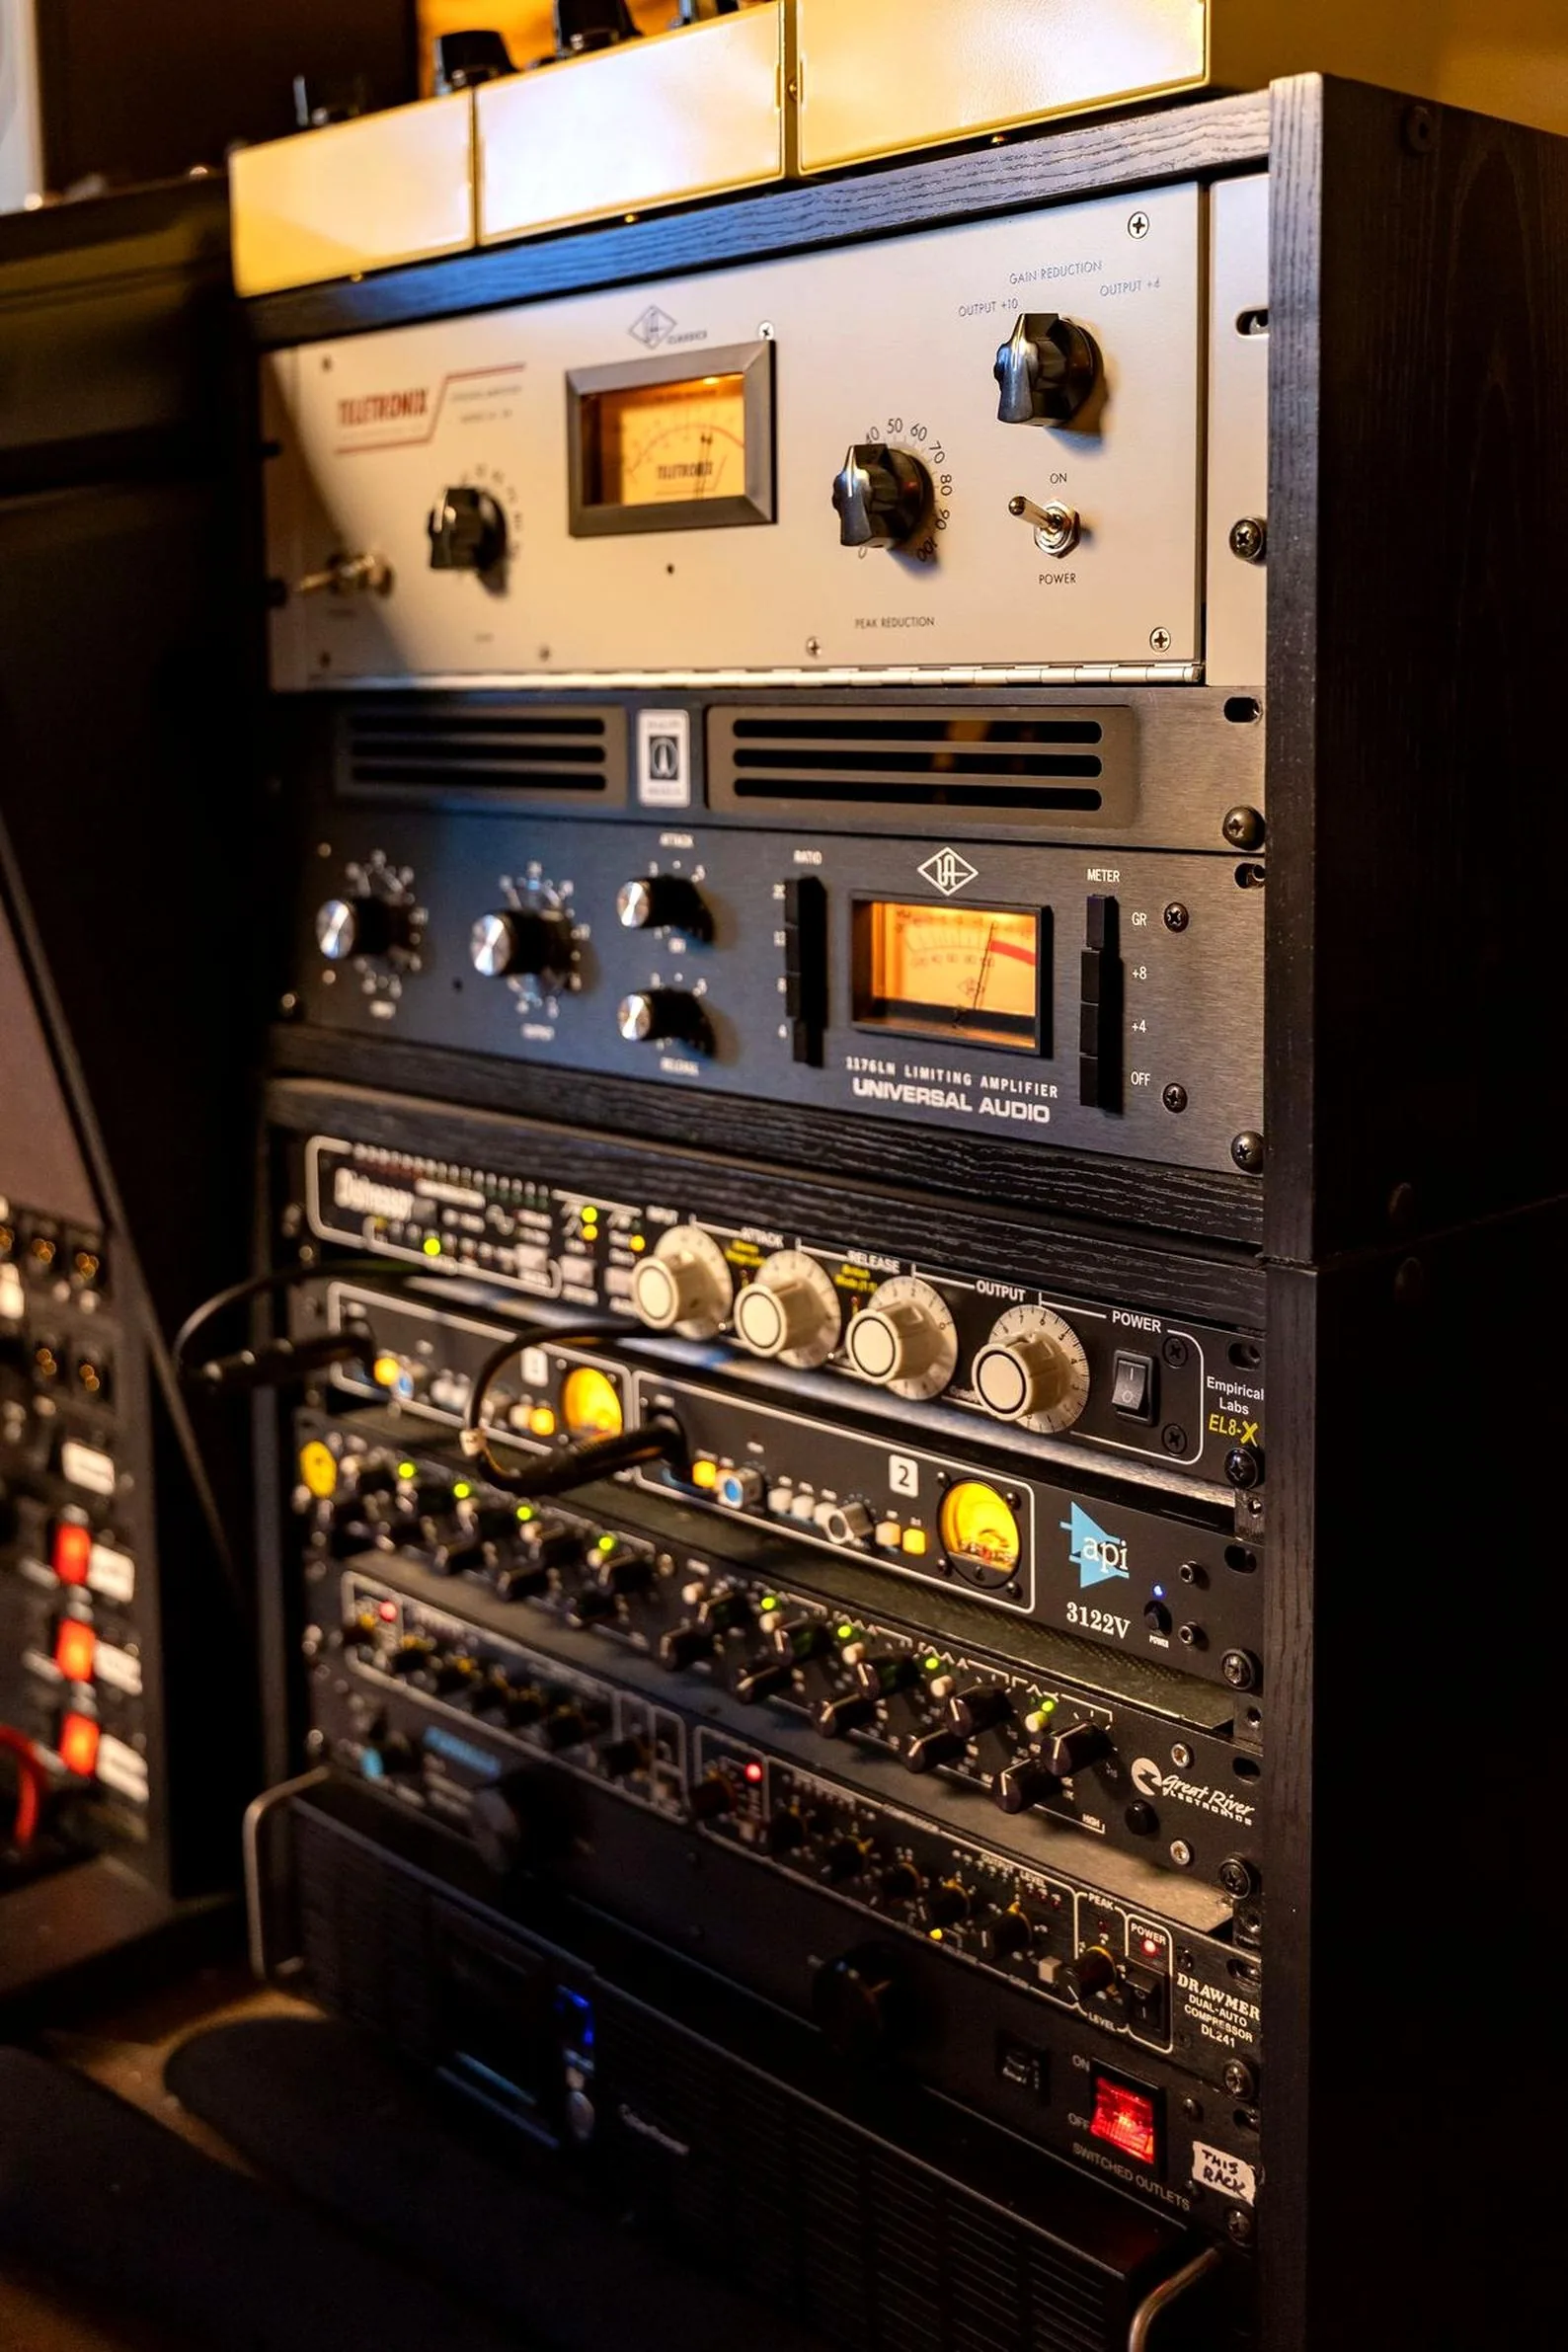
UREI 1176 (FET, solid-state) — Fast, aggressive, in-your-face. A studio staple since the 1960s. The famous “all-buttons” mode produces thick, distorted compression that sounds incredible on drums.
Teletronix LA-2A (optical, tube) — Smooth, transparent, musical. Only two controls—Peak Reduction and Gain. The go-to vocal compressor worldwide.
Compressors are built around four circuit topologies: FET (1176)—fast and aggressive. Optical (LA-2A)—smooth, natural gain reduction via light element and photocell. VCA (SSL G-Bus, dbx 160)—precise and punchy, commonly used on buses. Variable-mu/tube (Fairchild 670, Manley Variable Mu)—warm, glue-like character on program material.
A limiter is a compressor pushed to its extreme: a very high ratio (typically 10:1 or higher, often described as ∞:1) used as a brick wall against peaks that would otherwise clip. Where a compressor shapes the body of a signal, a limiter catches the transients that exceed a set ceiling and—with a high enough ratio and a fast enough attack—stops them dead. A true brick-wall limiter does exactly that; one with a softer attack or a finite ratio lets some of the transient slip through, which is sometimes what you want. Modern mastering chains almost always end with a brick-wall limiter to maximize loudness without distortion—it is the final guardrail before the signal leaves the studio. We cover compression and limiting in detail in Chapter 16.
Gates and Expanders
suggest a correctionA gate (noise gate) does the opposite of a compressor: it silences sounds below a set threshold. The practical use is removing unwanted noise between desired sounds—for example, a gate on a snare drum microphone opens only when the snare hits and closes between hits, eliminating bleed from the rest of the kit. My first time gating a snare on a live tracking session, I pulled the kick and hi-hat bleed out of the mic and the snare suddenly had attack and silence around it—separation that no amount of EQ could carve.
Common gate controls include threshold (the level below which the gate closes), range (how much the gated signal is attenuated—full silence or partial reduction), attack (how fast the gate opens once threshold is crossed), hold (how long the gate stays open after the signal drops), and release (how fast the gate closes). Set the attack too slow and you cut off transients; set the release too fast and the gate chatters around the threshold. A small amount of hold (10–50 ms) prevents the gate from re-triggering on natural decay.
An expander works on the same principle but with a gentler reduction rather than a hard cutoff—instead of slamming shut below threshold, it gradually attenuates. The relationship is worth memorizing: a gate is to an expander what a limiter is to a compressor—the gate is the extreme, hard-ratio version (a brick wall, like a limiter), and the expander is the gentle, lower-ratio version (like a compressor). Gates and expanders also take a side-chain (key) input, but for triggering and timing, not ducking—for example, keying a gate on a noisy kick mic from a clean kick sample so it only opens on the real hits, or tightening a sloppy bass with a gate keyed to the kick. (The familiar trick where the bass ducks every time the kick hits is side-chain compression, not gating—we cover that, along with gates and expanders, in Chapter 16.)
Saturation and Distortion
suggest a correctionSaturation devices add controlled harmonic distortion to a signal—the warmth, weight, and “glue” that engineers chase but no clean processor can produce. Where a compressor reduces dynamic range and an EQ shapes frequency response, a saturator generates new harmonic content that did not exist in the original signal. Used subtly, saturation makes a digital recording feel analog; used aggressively, it becomes the sound itself. It also behaves a little like a compressor: by rounding off and soft-clipping the peaks, it raises a signal's average (perceived) loudness without pushing its peak level any higher. That is why a saturated track sounds louder, fuller, and more present even when the peak meter barely moves—you are adding density and harmonics, not level.
The original saturation device was the tape machine. Studer, Ampex, MCI, and Otari open-reel decks soft-clip peaks and add odd-order harmonic distortion as you push the input level past their nominal “0 VU” mark. That gentle nonlinearity is the reason records from the 1970s and 1980s sound the way they do. Actual tape machines are rare and expensive today, but their character lives on in hardware emulators (Empirical Labs Fatso, Handsome Audio Zulu, Rupert Neve Designs Portico 5042) and plugins (UAD Studer A800, UAD Ampex ATR-102, Waves Kramer Master Tape, Slate VTM).
Tube saturation devices add a different flavor—softer clipping with more even-order harmonics. Boutique units like the Thermionic Culture Vulture introduce tube character at any point in the chain, on any source. Their plugin descendants (Pulsar Mu, Soundtoys Decapitator, FabFilter Saturn) have become some of the most-used tools in modern mixing precisely because they let you put analog character on a track that was never tracked through analog gear.
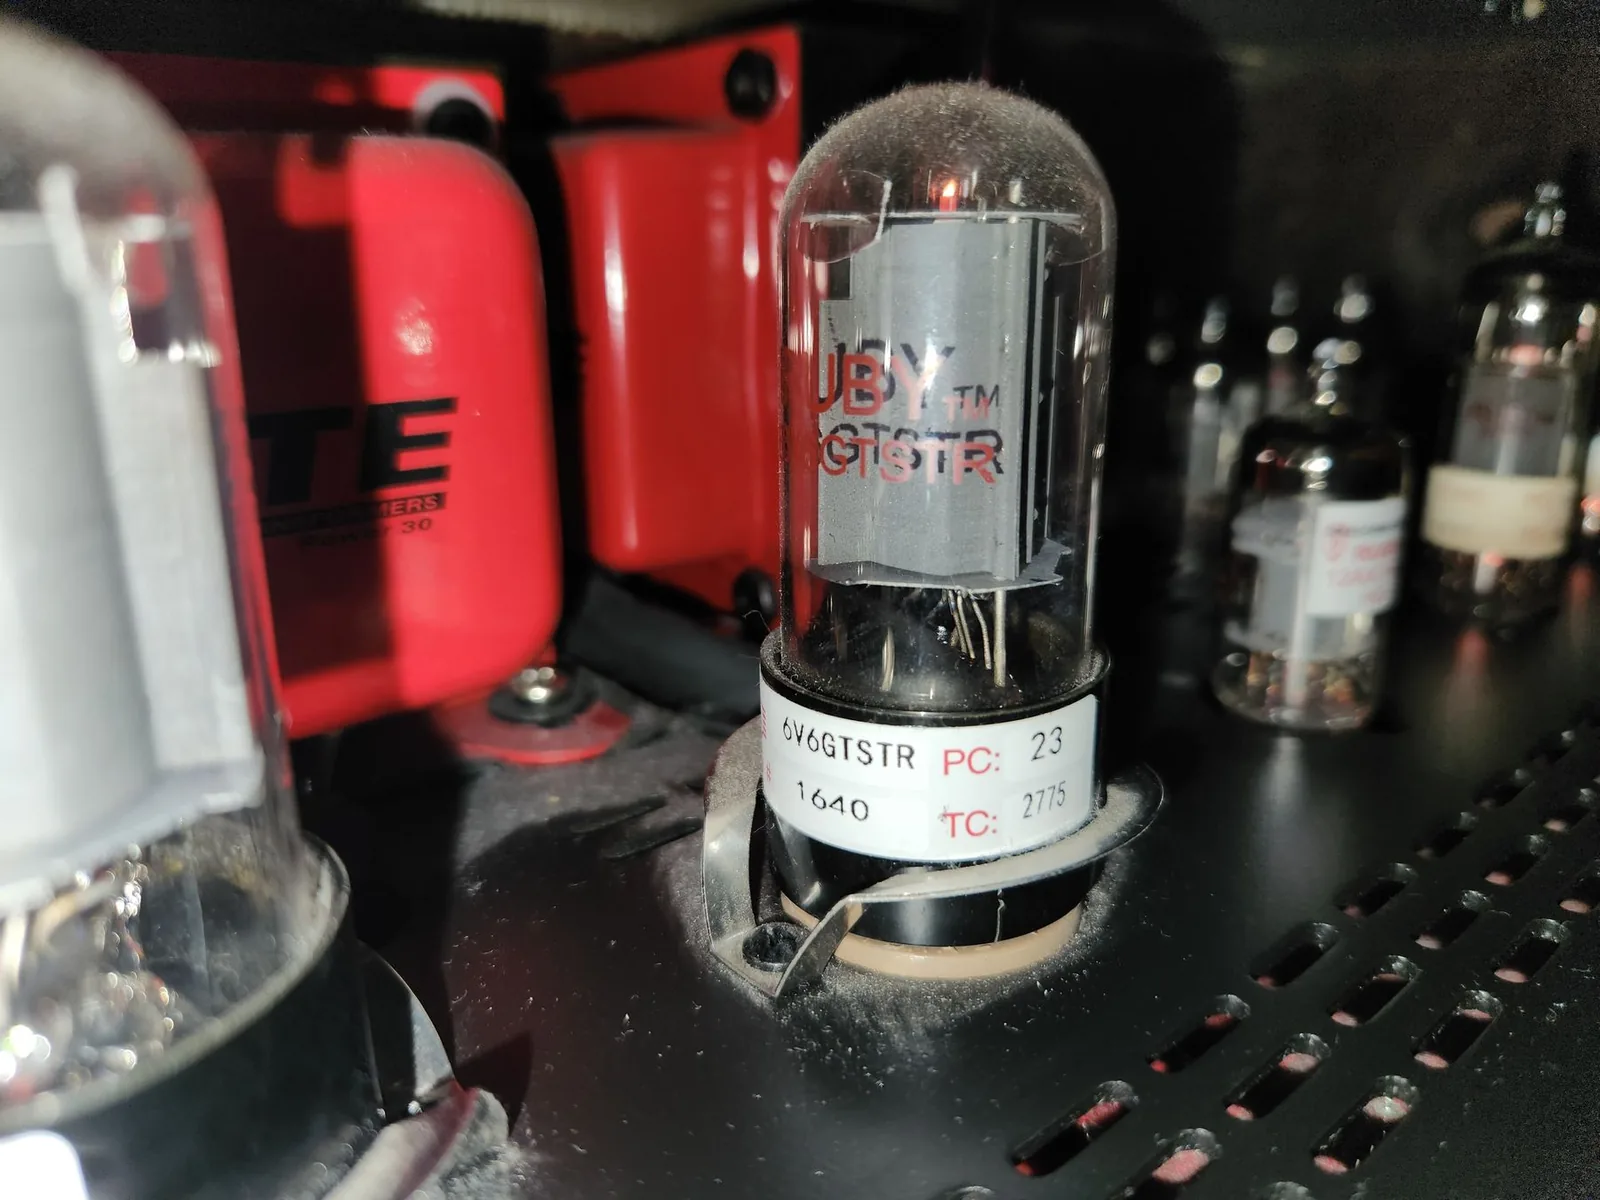
Guitar amplifiers are the loudest and most musical saturation devices in the studio. A great amp—Marshall, Vox, Fender, Mesa Boogie—is essentially a tube preamp into a power amp into a transformer into a speaker, with every stage adding distortion in a different way. We track guitars through amps in Chapter 6, but it is worth recognizing here: a guitar amp is the original signal-chain saturator, and most modern amp emulations (Universal Audio Dream/Lion/Ruby, Neural DSP Quad Cortex captures, Kemper Profiler, Line 6 Helix) exist specifically to put that sound into a digital workflow without requiring the room or the volume.
I once ran a clean DI bass through a Decapitator on a mix that was sitting flat, and the bass came alive in two seconds. It did not get louder, it did not get EQ'd, it did not get compressed—it got harmonics. That is why every modern mix engineer keeps at least one saturation tool in heavy rotation. The rule is the same as for compression: if you can hear it working, you have probably gone too far.
The 500 Series Format
suggest a correctionOriginally designed by API in the 1960s, the 500 series format has become the dominant modular standard for building custom analog signal chains. 500 series modules are small, single-function units (a preamp, an EQ, a compressor, a DI) that slide into a powered rack chassis (called a “lunchbox”). The chassis supplies power and audio connections; the modules do the processing.
The appeal is flexibility and variety. Instead of buying a $10,000 channel strip from a single manufacturer, you can mix and match modules from different companies—a Neve preamp (AMS Neve makes 500-series modules), an SSL-style compressor, an API EQ (API invented the format and builds its own)—mixing genuine modules from the original makers with boutique ‘style' modules inspired by them, building a custom signal chain tailored to your sound. Modules range from $150 to over $1,000 each. Chassis typically hold 6–11 slots.
Part of the appeal is also price. Because the chassis supplies the power and audio connections, the individual modules do not need their own power supplies, transformers, chassis, or rear-panel I/O—they share all of that with everything else in the rack. You make one good investment in a clean, well-regulated power supply (the chassis), and every module that drops in costs less than its standalone equivalent would. The day I dropped a pair of API 512 preamps into a lunchbox next to my monitors, the home studio crossed a sonic line I did not think it was going to cross at that price.
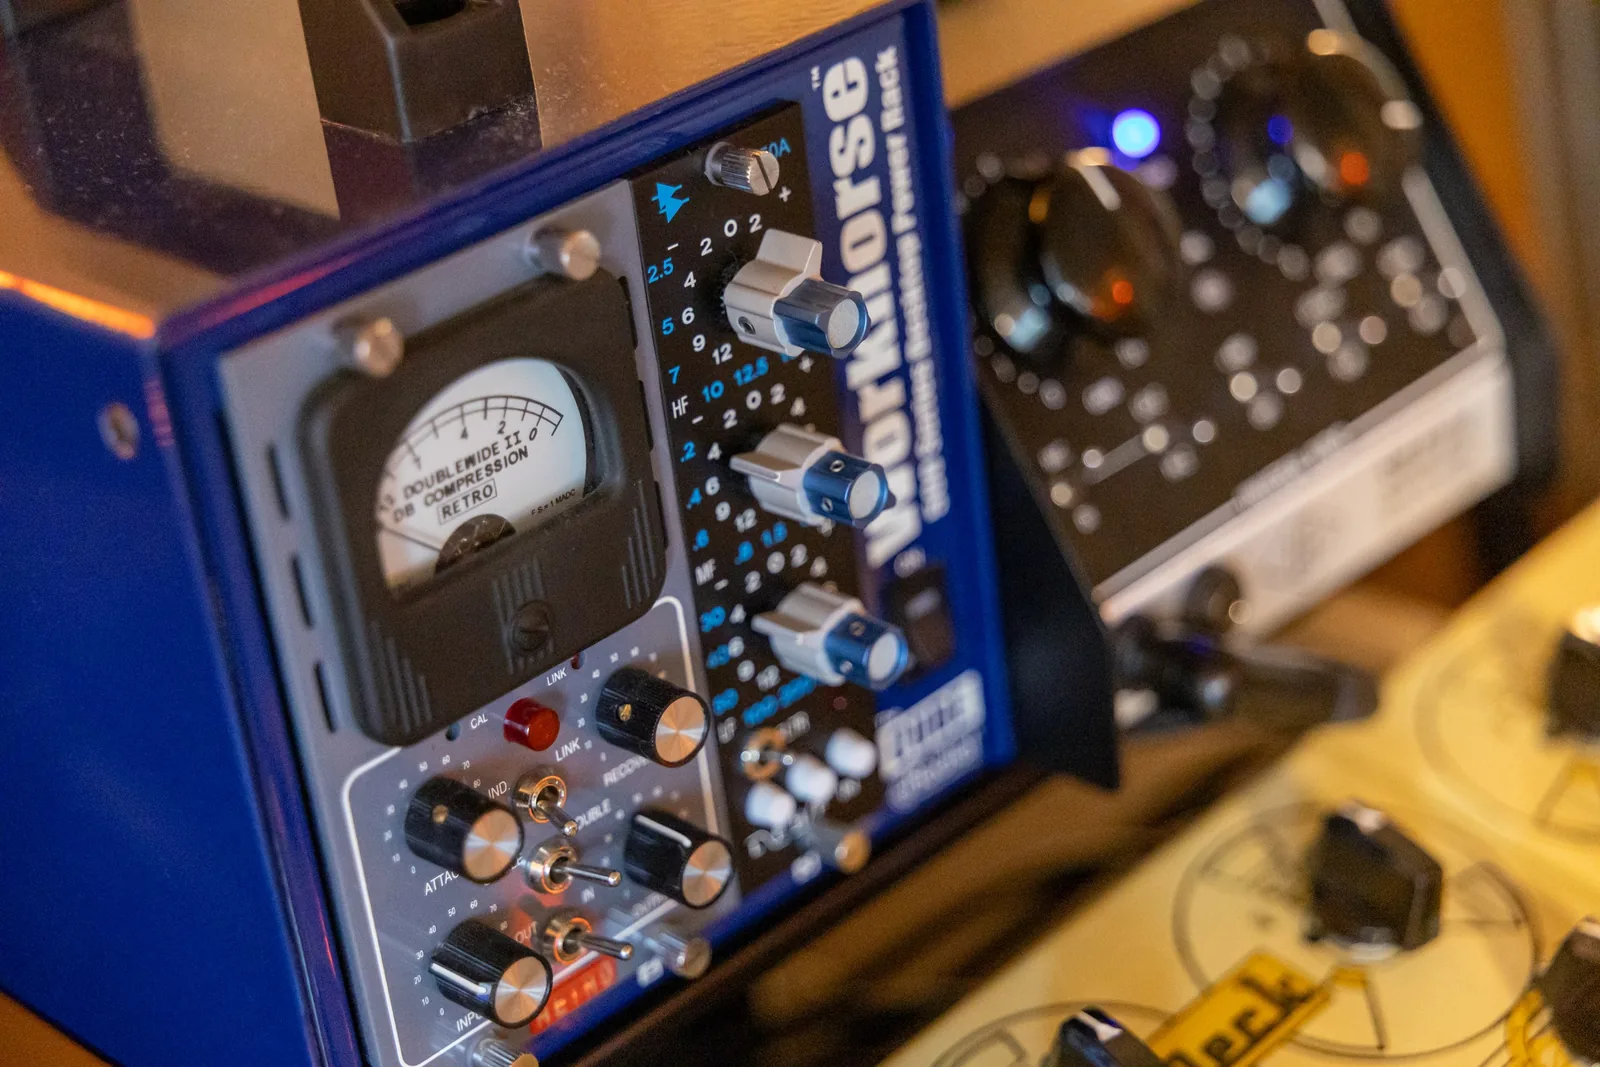
The 500 series format is an excellent entry point for engineers who want to start building an analog signal chain. A chassis with two or three carefully chosen modules can transform the sound of a home studio, and as your budget grows, you simply add more modules. Major 500 series manufacturers include API, AMS Neve, BAE, Shadow Hills Industries, Rupert Neve Designs, Heritage Audio, and dozens of boutique builders. If you are serious about analog processing but cannot afford a full rack of standalone units, start here.
Time-Based Effects
suggest a correctionTime-based effects give the listener subconscious cues about the size and dimension of a space. Just as panning positions a sound left or right, time-based effects position sounds forward or backward in the mix—and they do more than depth. Stereo delays, wide reverbs, and modulation effects also expand the width of a sound, spreading it across (and even beyond) the space between the speakers. Used subtly, they create depth, width, and realism; used aggressively, they become creative tools that transform a sound entirely.
The most common time-based effects you will see on a session are reverb (simulated reflections of a physical space—room, hall, plate, chamber—adding depth and dimension), delay or echo (discrete repeats at set time intervals, tempo-synced for rhythm or short for thickening), chorus (signal duplicated with slight pitch and timing variations, sounding like multiple voices playing together), flanging (a more extreme version of chorus, with a sweeping jet-like character produced by a continuously changing delay time), and phasing (all-pass filters creating a sweeping, swirling motion—similar to flanging but less metallic and more organic).
Pitch effects are a separate family worth distinguishing here: harmonizers and pitch shifters alter the pitch of a signal (for harmonies, octave effects, or sound design) rather than its position in time. They are often grouped with time-based effects because they live in the same rack and plugin folders, but mechanically they belong in their own category. They turn up alongside the time-based effects in Chapter 17.
Classic hardware effects units like the Lexicon 480L (reverb), Eventide H3000 (harmonizer), Bricasti M7 (reverb), and Roland RE-201 Space Echo (tape delay) remain legendary—and a few of the very best mixers still keep one or two on the rack just for color. But the vast majority of time-based effects today are applied using plugins, and the modeled versions of the legends sound remarkably close. We cover time-based effects in depth in Chapter 17.
Summing Amplifiers
suggest a correctionA summing amplifier combines multiple analog inputs into a stereo output, performing the mixing function of an analog console without all the additional features. Some engineers feel that analog summing adds a certain depth, width, and character that digital summing in the DAW does not. Studios without full consoles often use rack-mounted summing amps (Dangerous 2-Bus+, SSL Sigma) for their compact size and analog character.
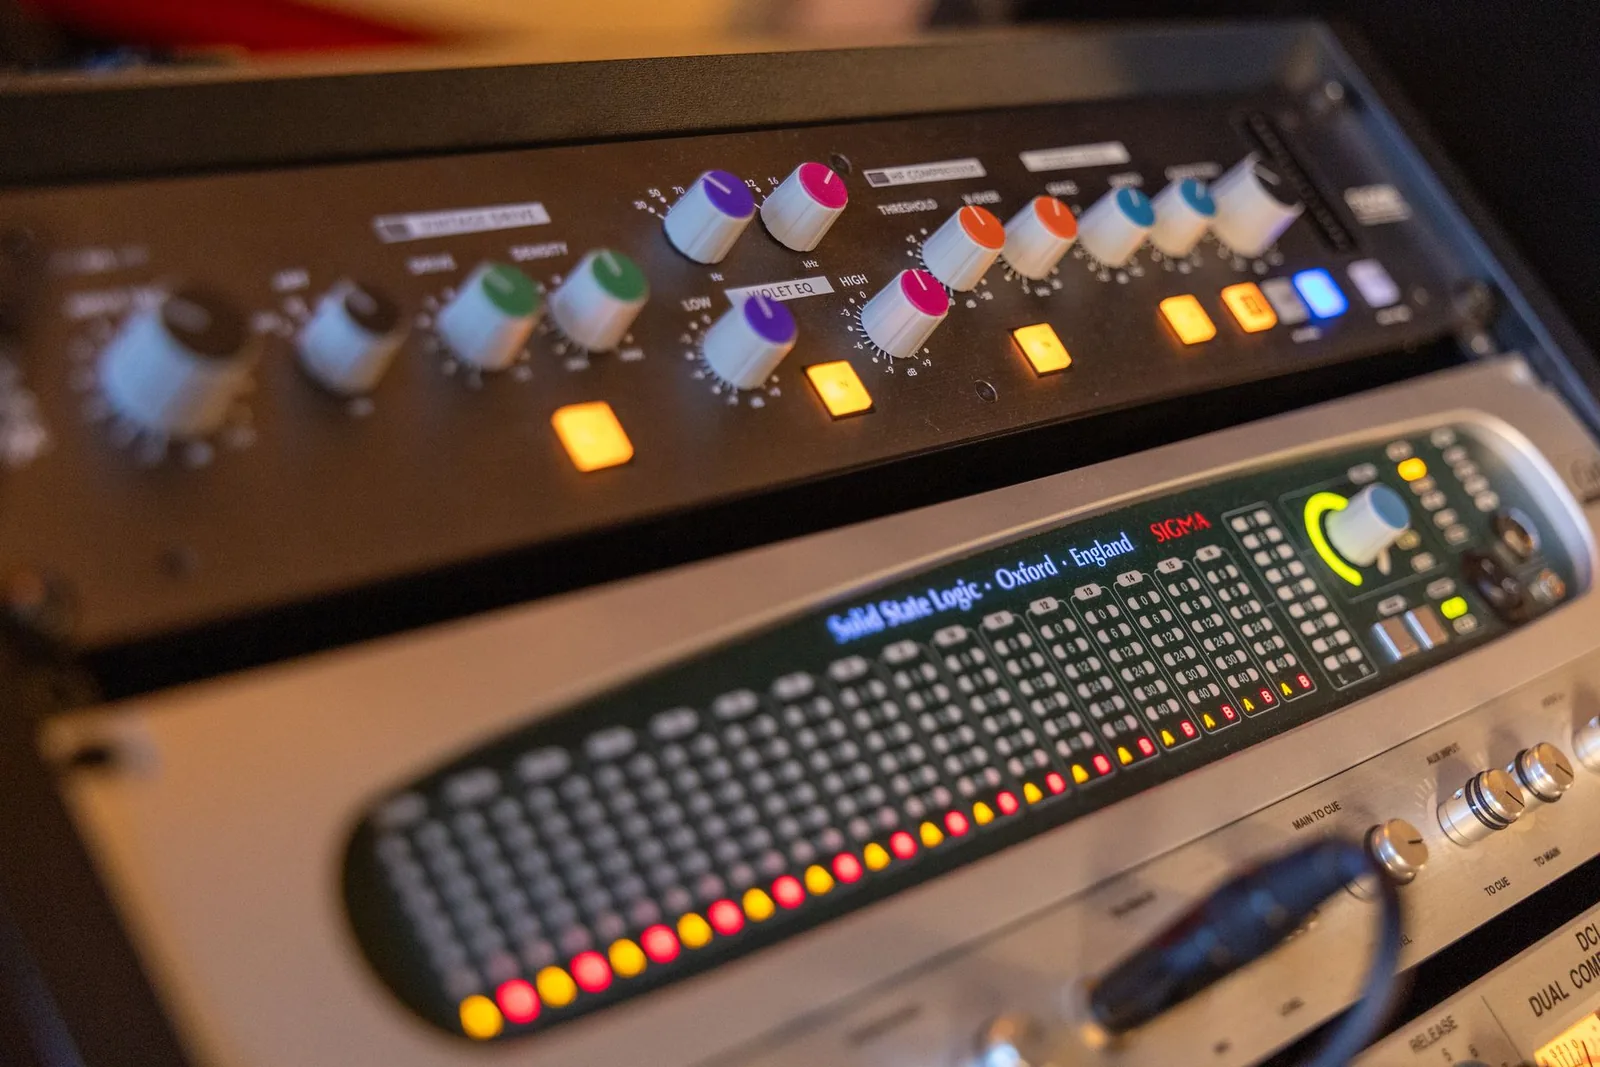
I have done the A/B more than once. On some mixes the analog-summed version felt a hair wider and a hair more relaxed; on others I genuinely could not tell, and the engineer next to me swore he could. The honest take: analog summing is real but subtle, and it is the last thing you should worry about. DAW summing is mathematically precise and transparent, and many world-class mixes are done entirely in the box. Spend the money on the front end—a great mic, a great preamp, a great room—before you spend it on a summing amp.
If you do run one, the wiring is simple: assign your stems to groups of interface line outputs—drums out 1–2, bass 3–4, music 5–6, vocals 7–8—feed those into the summing amp's channels, and record its stereo output back into the DAW on a clean input pair at unity gain. The mix decisions stay in the box; only the final combine happens in the analog domain. That is the whole trick, and it takes twenty minutes to set up the first time.
Meters
suggest a correctionMeters indicate volume, gain reduction, frequency content, or phase—they are how you see what your ears are hearing. Peak meters (typically LED strips going from green to yellow to red) respond instantly to transients and are standard on digital equipment. VU (Volume Unit) meters use a moving needle and respond more slowly, showing average signal level—they are standard on analog equipment and valued for indicating perceived loudness. LUFS meters (Loudness Units relative to Full Scale) measure integrated loudness over time and have become essential for meeting streaming platform standards (typically −14 LUFS for Spotify, −16 LUFS for Apple Music). Spectrum analyzers display frequency content in real time, while phase meters show stereo correlation.
Good metering habits will save you from problems you cannot hear on your monitors. Trust your ears first, but verify with meters. In practice the division of labor is simple: during tracking, watch the peak meter—one clipped transient ruins a take; during mixing, check integrated LUFS to know your real loudness over time; treat the spectrum analyzer and phase meter as second opinions on tonal balance and mono compatibility.
Monitor Controllers
suggest a correctionA monitor controller is the hardware box (or software feature) that sits between your audio interface outputs and your monitor speakers. It is the piece of gear you touch every minute of every mix session—master volume, dim, mute, mono-check, and switching between multiple monitor pairs all live here. Without one, you are reaching across the desk to turn down the interface every time the phone rings.
A good monitor controller does several jobs at once. It provides a single, repeatable master volume (so the calibrated reference level you set is the same from session to session). It lets you switch between two or three pairs of monitors (so you can A/B a mix between Genelecs and a pair of NS-10s without touching cables, and check the same mix on a small Auratone-style speaker for translation). It includes mono and dim buttons—mono check is non-negotiable for any mix headed to streaming, radio, or club playback, and dim lets you instantly drop level for conversation without losing your reference position. Most also include a headphone amp, talkback, and one or more sets of cue outputs for the live room.
Units range from the budget Mackie Big Knob to the prosumer SPL Crimson and Drawmer MC2.1, up to flagship designs like the Dangerous Music Monitor ST, the Grace m905, and the Crookwood M1. At the high end, a serious monitor controller is one of the few pieces of gear in your studio that you will keep across multiple console upgrades—once you find one that does what you want, you stop thinking about it, and that is exactly the point.
Your hand should live on the monitor controller's volume knob during a mix. If you find yourself reaching past it to adjust something else, the routing is wrong. Build the studio around the assumption that volume, source switching, and mono check are always one button away.
Audio Interfaces and AD/DA Converters
suggest a correctionAn audio interface is the most essential piece of hardware in a modern digital studio—and it is essential precisely because it consolidates so many of the pieces you have just read about into a single box. A modern interface combines a preamp, a DI input (Hi-Z) for direct-tracking guitar and bass, an AD/DA converter, a headphone amplifier, basic monitor-controller features (master volume, often mono and dim), and the computer connection itself, all in one unit. For most home and project studios, the audio interface is the only piece of outboard gear you need.
AD/DA converters are transducers that convert analog signal to digital (AD) and digital signal back to analog (DA). The quality of conversion directly affects the fidelity of everything that enters and leaves the digital domain. What separates a great converter from an average one? Clock quality—the precision of the timing reference that controls when each sample is captured—is the single most important factor. Poor clocking introduces jitter, which manifests as a subtle harshness or smearing. Dynamic range (measured in dB) indicates the gap between the quietest signal and the noise floor—professional converters achieve 120 dB or more.
Audio interfaces range from simple 2-channel USB devices to large multi-channel Thunderbolt systems. When choosing one, consider the number of simultaneous inputs and outputs you need, the quality of the built-in preamps, the type of computer connection (USB-C or Thunderbolt), driver stability, and whether DSP processing is included.
Most of the popular interfaces you see in YouTube videos and on student desks are entry-level and prosumer—built to a price point, not a fidelity ceiling. The Focusrite Scarlett series is the best-selling interface in the world for a reason (clean preamps, reliable USB-C, low cost) but it is an entry rig, not a pro one. The Universal Audio Apollo series is the most popular “prosumer” option—good preamps, solid Thunderbolt, and a UAD DSP card that runs near-zero-latency hardware emulations during tracking. RME Fireface and Babyface interfaces sit higher again, with the most stable drivers in the industry; I have run RME rigs through fourteen-hour sessions without a single dropout, which is not something I can say for every interface I have owned. MOTU 828/M-Series and Audient iD series round out the prosumer tier.
For studios demanding professional conversion fidelity, dedicated standalone converters are where the real reference begins: Lynx Aurora(n), Prism Sound ADA-8XR, Burl Audio Mothership, Apogee Symphony, and RME ADI-2 Pro. The difference between a prosumer interface converter and a true professional standalone converter is subtle but real—you hear it most in the clarity of transients, the depth of the stereo image, and the smoothness of the high frequencies. If you are tracking commercial work, mastering, or running a room that bills clients, this is the tier where the chain stops being the bottleneck.
Power Conditioning and Protection
suggest a correctionI once watched a power surge take out a preamp, an interface, and a pair of studio monitors in a single flash. The studio had a power strip, not a conditioner. That was a $3,000 lesson learned in one second.
Power conditioners, voltage regulators, and uninterruptible power supplies (UPS) protect studio equipment and ensure it operates at peak performance. Electrical voltage constantly fluctuates—gear in the US is designed to operate at 120 volts. Anything significantly above or below can cause underperformance or damage. A voltage regulator stabilizes the power supply, while a UPS provides battery backup during outages.
Surge protection is critical—a single power surge can destroy thousands of dollars of equipment in an instant. Quality power conditioners include surge protection, EMI/RFI filtering (which reduces electrical noise that causes hum and buzz), and line voltage indicators.
Power sequencing is the practice of turning equipment on and off in the correct order: power on from source to speakers (computer → interface → processors → monitor controller → monitors last). Reverse the order when powering down. This prevents pops, clicks, and potential speaker damage.
Talkback Systems
suggest a correctionTalkback is how the engineer in the control room talks to the performers in the live room without leaving the chair. A small microphone (often a cheap dynamic, sometimes built into the console or monitor controller) routes through a momentary switch to the headphone cue mix. Press the button, talk, release—the performers hear you in their headphones; the talkback signal does not record. Without it, you are either yelling through glass, walking back and forth between rooms, or playing charades. Every tracking session needs a working talkback path.
On a hardware console, talkback is built into the master section—one button, one mic. In a console-less studio, talkback comes from one of three places: a dedicated monitor controller (Audient Nero, Drawmer MC, SPL Crimson, Heritage Audio R.A.M. System) with a built-in talkback mic and switch; an audio interface that includes talkback functionality (Apollo, RME, MOTU, Audient—most flagship interfaces); or a software talkback feature inside the DAW, triggered by a key command and routed through a permanent dedicated mic at the engineering position.
Whatever you build, set it up so the talkback is always one button away. The session that loses momentum because the engineer has to stop and re-route audio just to say “one more take” is the session where the great vocal performance gets away.
Headphone Distribution and Cue Mixes
suggest a correctionThe moment a session has more than one performer in the live room, you need a way to send each player their own headphone mix at their own level. A drummer hears too much click; a vocalist needs more of their own voice; a bassist wants the kick high. Trying to make one cue mix that serves everyone is one of the fastest ways to torpedo a tracking session.
A headphone distribution amplifier simply takes a stereo input and provides multiple headphone outputs with their own volume controls—useful when everyone is happy with the same cue mix and just needs their own volume. The Furman HDS family and the PreSonus HP60 are common in project studios.
A personal cue-mix system gives every performer their own custom mix. The engineer sends a stem (or stems) from the DAW—drums, bass, scratch vocal, click—to a personal mixer at each performer's station, where they dial in their own balance. The Hear Technologies Hear Back OCTO and the Aviom A360 are the industry standards; players often rave about them after sessions because they finally get to hear what they need to hear. Once you have run a session with a personal cue system, you will not want to go back. Performers play better when they can hear themselves the way they want to.
A practical reminder: tracking-session headphones should be closed-back (not the open-back ones you mix on). Closed-back design prevents the click and the cue mix from bleeding into the room mics—an open-back headphone next to a vocal microphone is a guaranteed bleed problem.
Plugins and Software Processing
suggest a correctionIn the modern digital studio, the vast majority of signal processing is performed using plugins within the DAW. Plugins are available in several formats (AAX for Pro Tools, VST3, AU for macOS) and range from free to thousands of dollars. Many plugins are modeled after classic hardware, offering remarkably accurate emulations of the 1176, LA-2A, Neve 1073, and SSL channel strips at a fraction of the cost.
The democratization of audio processing through plugins is one of the most significant shifts in the history of recording. Twenty years ago, the processing on a professional mix cost tens of thousands of dollars in hardware. Today, a student with a laptop and a $200 plugin subscription has access to the same tools. The playing field has never been more level—and I will tell you what most veterans will not say out loud: I regularly hear student mixes that beat records I made fifteen years ago on $50,000 of outboard gear. The hardware was beautiful. The kid had better ears.
Plugin companies like Waves, FabFilter, Universal Audio, Plugin Alliance, Soundtoys, and iZotope offer extensive libraries covering every processing need. AI-powered platforms take this further by analyzing stems and generating processing presets automatically—we explore this in Chapter 22. While hardware remains valued for its unique character and tactile workflow, plugins have made professional-quality processing accessible to studios at every budget level. Many engineers use a hybrid approach—tracking through select analog hardware for character, then mixing with plugins for recall and flexibility.
MIDI Devices
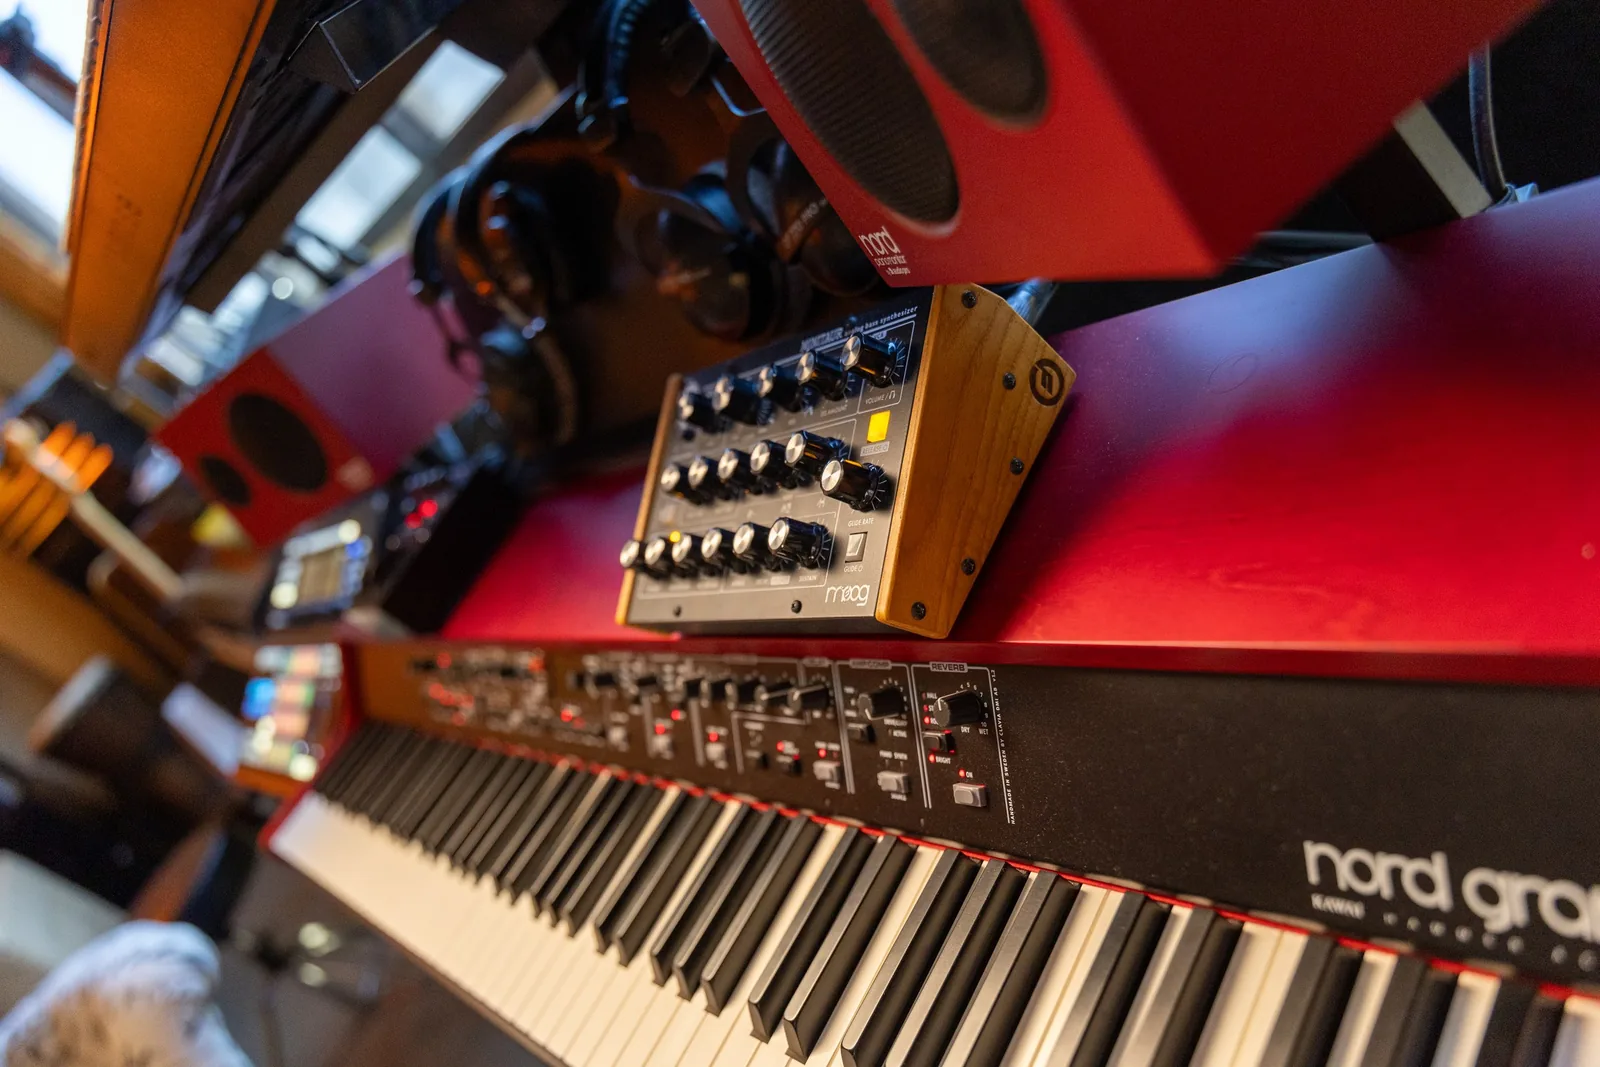
suggest a correctionMIDI (Musical Instrument Digital Interface) is a digital protocol that transmits performance data—which notes are played, how hard (velocity), any modulation, pitch bends, and more. MIDI devices include keyboards, synthesizers, drum machines, samplers, pad controllers, and control surfaces. Most modern controllers connect via USB. We cover MIDI in depth in Chapter 10.
The Studio Computer
suggest a correctionThe computer is the central hub of the modern digital studio—it serves as the console, signal processor, storage facility, and mastering suite all in one. Spec it carelessly and you will fight pops, dropouts, and high-CPU warnings every session; spec it well and you will forget the computer is even there.
I built my first DAW rig in 2008 with what I thought was plenty of RAM. Six months later I was freezing tracks on every session because the orchestral library would not load alongside the rest of the plugins. Doubling the RAM cost a fraction of what I had already burned in lost session time. Spec the computer once, spec it right, and treat the upgrade cost as a session-time investment rather than a sunk one. Each component matters for a different reason.
RAM is where everything that needs to be fast lives. Sample libraries (Kontakt, Spitfire) load their playable instruments into RAM so they trigger without disk lag. Plugin instances reserve RAM for their algorithms. Virtual instruments cache their sample sets. A modern orchestral session with strings, brass, woodwinds, percussion, and choir samples can eat 40–60 GB of RAM before you have placed a single audio track. Aim for 32 GB minimum for tracking-and-mixing work, 64 GB for serious virtual instrument sessions, and 128 GB if you score for picture or run heavy sample-based composition.
Processor is two specs in one: total core count and per-core (single-thread) speed. DAWs distribute audio processing across cores, so more cores means more simultaneous plugin instances. But individual track chains run on a single core, so each plugin in series is bound by single-thread speed—which is why a slower-clocked many-core server CPU can choke on a single heavy chain that a faster four-core consumer CPU handles fine. Apple Silicon (M-series) chips offer the best performance-per-watt available, with unified memory architecture that eliminates traditional CPU/GPU/RAM bottlenecks; the M-series Studio and MacBook Pro variants have become the dominant choice for new studio builds. Intel and AMD processors remain the standard for custom PC builds, with AMD's Ryzen and Threadripper lines pushing high core counts at competitive prices.
Storage should be tiered. The fastest internal storage—an NVMe SSD—runs the operating system, the DAW, and the active session. A second NVMe or fast Thunderbolt SSD streams sample libraries, which need sustained read speed to avoid voice-stealing on dense passages. A slower drive (large SATA SSD or external HDD) holds the archive: completed sessions, stems, masters, project backups. The principle is simple—separate the drive that is being read from constantly (samples) from the drive that is being written to constantly (the active session), or you will hit I/O contention.
Connectivity. Connection between computer and audio interface is where round-trip latency lives or dies. Thunderbolt 3/4 is the gold standard for studio work—low latency, high bandwidth, lock-solid driver implementations. USB-C is fine for modest channel counts and most home interfaces. Older USB-2 will work but tends to choke on high channel counts at low buffer settings.
Operating System. Both macOS and Windows are fully capable platforms. macOS (particularly on Apple Silicon) is known for stability and Core Audio's reliably low latency—it is the most common platform in commercial studios. Windows offers more hardware flexibility, lower-cost custom builds, and broader gaming-rig parts compatibility. Linux is a third option that does not get enough mention—Reaper, Bitwig Studio, Ardour, and Mixbus all run natively on Linux, JACK provides professional-grade low-latency audio routing, and a properly configured Linux box is among the most stable computer environments you can build for music. Studios that prioritize uptime and customization, particularly in mastering and post-production, increasingly run Linux. Verify that your audio interface and DAW have certified drivers for whichever platform you choose.
Budget Tiers for Studio Setup
suggest a correctionNow that you know what each piece of gear does, here is what a complete studio looks like at four price points. The numbers are guidelines; the priorities are the lesson.
The $500 entry/bedroom rig is built around getting you tracking today. A two-channel USB interface (Focusrite Scarlett Solo or 2i2) handles a mic and a guitar. One closed-back tracking headphone (Audio-Technica ATH-M50x) doubles as your monitoring solution since you cannot afford monitors yet. One large-diaphragm condenser (AT2020) covers vocals, acoustic guitar, and most home-studio sources. A free DAW (Pro Tools Intro, GarageBand, Reaper trial). DIY acoustic panels—Rockwool, fabric, and a staple gun—will outperform untreated walls dramatically. This rig has shipped songs that charted; it will ship yours too if you put in the time.
The $1,500 project rig is where the studio starts to feel like a studio. A better interface (Audient iD14, UA Volt 476, or PreSonus Studio 26c) gives you cleaner preamps and more I/O. Entry-level monitors (Yamaha HS5 or KRK Rokit 5) put air around your mixes that headphones never can. A versatile condenser (Rode NT1-A or AT4040) plus a Shure SM57 covers most tracking needs. Pro Tools Artist or Studio subscription gets you in the workflow that runs commercial sessions. Proper acoustic treatment—first-reflection points, bass traps in corners, ceiling cloud—makes the monitors actually trustworthy.
The $3,000 semi-pro rig is what a working freelance engineer brings to a project. A prosumer Thunderbolt interface (UA Apollo Solo or RME Babyface Pro) with low-latency monitoring. Mid-tier monitors (ADAM Audio T7V or Focal Shape 50). A flagship dynamic (Shure SM7B or EV RE20) and a proper large-diaphragm condenser (Neumann TLM 102 or Aston Spirit). Pro Tools Studio. Reference headphones (Sennheiser HD 600 or Beyerdynamic DT 1990). Comprehensive room treatment from a real acoustic-treatment company (GIK, Auralex). At this tier the gear stops being the bottleneck—your ears and your room become the limit.
The $10,000+ true-pro rig is what a commercial-grade tracking and mixing room looks like at the entry of professional. A reference-grade converter (Lynx Aurora(n), Apogee Symphony, RME ADI-2 Pro) drives a high-end Thunderbolt interface or runs into a professional rig. One or two boutique preamps (Neve 1073, API 3124, Shadow Hills Mono GAMA) give you a flavor on the front end. At least one classic hardware compressor (an 1176 reissue, an LA-2A, or an Empirical Labs Distressor) for vocals and bus duty. Mastering-grade monitors (PMC, ATC, Genelec 8351B or Neumann KH 310). A small but serious mic locker—a U 87 or U67, an SM7B, an SM57, an AEA R84 ribbon, a pair of small-diaphragm condensers (KM 184, KSM 141). Custom-designed acoustic treatment for a tuned control room. A dedicated, optimized studio computer. A Pro Tools HDX or Studio rig. Total: easily $10K, often $30–$50K when the whole picture comes together.
At every tier, acoustic treatment is in the budget—because the best gear in the world cannot compensate for an untreated room. And at every tier, the rule is the same: master what you have before you upgrade. A producer working with a $1,500 rig and ten years of focus will outdraw a producer with a $50K room and three months of practice every time.
The Toolbox
suggest a correctionThat room full of blinking lights that made me freeze on my first day? I can walk through it with my eyes closed now. Not because I memorized every piece of gear, but because I learned the categories: preamps amplify, converters translate, EQs shape, compressors control, monitors reveal, and the signal flows through all of them in a chain. Once you understand the chain, the specific gear is just details.
Here is something I wish someone had told me when I was staring at that rack for the first time: most of the best records you have ever heard were made with a fraction of the gear in that room. The Beatles recorded Sgt. Pepper's on a four-track. Billie Eilish's debut album was made in a bedroom. Dr. Dre's 2001 was mixed on an SSL, but the beats were programmed on an Akai MPC. The gear matters, but it matters far less than knowing how to use it.
The equipment is the toolbox. Knowing when and why to reach for each tool is what makes an engineer. Start with what you can afford, learn it inside out, and upgrade when the gear—not the skill—is the bottleneck. Every studio you have ever admired started with less than you think.
Review Questions
Work these before moving on — every question is answerable from this chapter. Written answers live in the instructor Answer Key, available to course adopters.
- Describe the four types of consoles (analog, hybrid, digital, control surface).
- List the sections of a console channel strip in signal flow order.
- What is the purpose of a preamp?
- On a preamp with separate input and output gain controls, what is the practical difference between cranking the input versus cranking the output?
- What is an audio interface?
- What is gain staging, and why is it important? Why is it a problem to pad one device only to boost the next?
- What is an EQ? What are the two main types?
- What is a compressor? Name two classic hardware compressors.
- What is a gate/expander? Give an example.
- Compare peak, VU, and LUFS meters.
- What is a summing amplifier?
- What role do plugins play in the modern studio?
- What computer specs matter most for a studio? What does each one affect in practice?
- Describe the recording signal flow from source to DAW, then trace the monitoring signal flow back from DAW to monitors.
- What is the 500 series format? Why are individual modules typically less expensive than their standalone equivalents?
- What is the difference between an active and passive DI box?
- Name the four main compressor topologies.
- What is subtractive EQ?
- What is power sequencing and the correct power-on order?
- What is talkback, and why is every tracking session lost without it?
- Compare a headphone distribution amplifier with a personal cue-mix system. When would you reach for each?
- What is an AD/DA converter? What determines conversion quality?
- Explain the difference between an insert and a send.
- A studio is choosing between three active monitor designs: one uses a Class A amplifier throughout, one uses Class AB, and one uses Class D on the woofer with Class AB on the tweeter. Compare the engineering trade-offs of each topology—efficiency, heat, distortion profile, and practical suitability for long mix sessions—and justify which design you would recommend for an engineer who mixes eight-hour sessions in a small, inadequately ventilated room.
Studio Exercise: Diagram Your Studio Signal Flow
This exercise is the most useful single document you will produce in this book. By the end of Chapter 22, the diagram you start today should evolve into a complete, accurate, working map of your studio—one you could hand to a substitute engineer or an investor and have them understand the entire room in five minutes. Engineers who keep one of these on file are the ones who get the next session.
Part A: The Signal Flow Diagram. On paper, on a tablet, or in any drawing tool (Lucidchart, Miro, draw.io), diagram your current studio's signal flow, or the studio you want to build. Show every path the signal takes from input to speakers: every microphone, every cable type, every preamp, every processor, every converter, every DAW input, every output, every headphone jack, every speaker. Label every cable with its type (XLR, TRS, ADAT, USB, Thunderbolt, optical) and its approximate length. Draw both the recording path and the monitoring path—they are different chains. Use color-coded lines: one color for analog audio, one for digital audio, one for MIDI, one for clock or sync, one for power.
Part B: The Categorized Inventory. Compile a categorized inventory of your studio: audio interface(s), microphones, preamps, equalizers, compressors, converters, monitor controller, monitors, headphones, headphone distribution, talkback, MIDI controllers, instruments, power conditioning, computer, accessories, software (DAW + plugins). For each item, note: make and model, year acquired, primary use, and one alternative you would reach for if it failed tomorrow. The “what would I replace it with” column is the part most students skip and the part that most predicts whether you actually understand your own room.
Part C: Identify One Improvement. Look at your diagram and identify exactly one signal-flow improvement you could make in the next thirty days—a cable upgrade, a routing simplification, a piece of gear that would close a real gap, a workflow change that would save you time on every session, or an organizational change like cable management, labeling, or patchbay normalling. Note it on the diagram and explain in two or three sentences why this is the highest-leverage improvement available to you right now. Do not pick a fantasy upgrade you cannot execute. Pick one that will be done before next month's first session.
Common pitfalls. Three things students miss the first time: (1) the monitoring path is a real signal chain too—do not skip it just because the audience never hears it. (2) Sync, talkback, and clock signals are part of your studio even when they are not carrying music; show them. (3) An accurate diagram of a small rig beats a fancy diagram of a fantasy rig every time. Draw what you have, not what you wish you had.
Submission. Combine the diagram, the inventory, and the improvement note as a single PDF saved as StudioMap_v1.pdf. Increment the version (v2, v3…) every time the room changes meaningfully—new gear, new routing, new acoustic treatment, new monitor placement.